At the moment we are still working on making the documentation better and more clear. The last months we spend the most effort in getting the hardware ready. Making the documentation is another part which needs a lot of attention. At the moment the documentation should be sufficient to build the Z-Unlimited, but we will convert your comments and improvements as soon as possible so it will be even easier for the next users. Please let us know if something is not clear. The google group is the place to post public questions at the moment.
Keep in mind that 3D printing with the Z-Unlimited needs another strategy than 3D printing you used to do. It requires new skills in slicing, resuming prints and overall knowledge. Everything you see and do is new! So some things might not go as easy as you expect. We do think that the Z-Unlimited will fit your creative expectations…!
Please note that when you start printing bigger objects the risk of failure is also becoming bigger. That’s why I would like to share some tips and tricks with you.
- I prefer printing with a larger nozzle [>0.6mm] to keep the printing time within limits.
- Bigger prints need more filament, so keep an eye on the end of the spool! I’m experimenting with a filament detection system from Tunell.
- Use Octoprint for remote control and monitoring to keep an eye on your print.
- Don’t be afraid to resume stopped prints.
- Use the included support system to stabilize your print.
Order
- Rails
- Top belt holder
- Connectors
- Bed
- Carriage
- Mount Ultimaker
- Bottom belt holder
- Firmware & Software
- Support arms and yarn
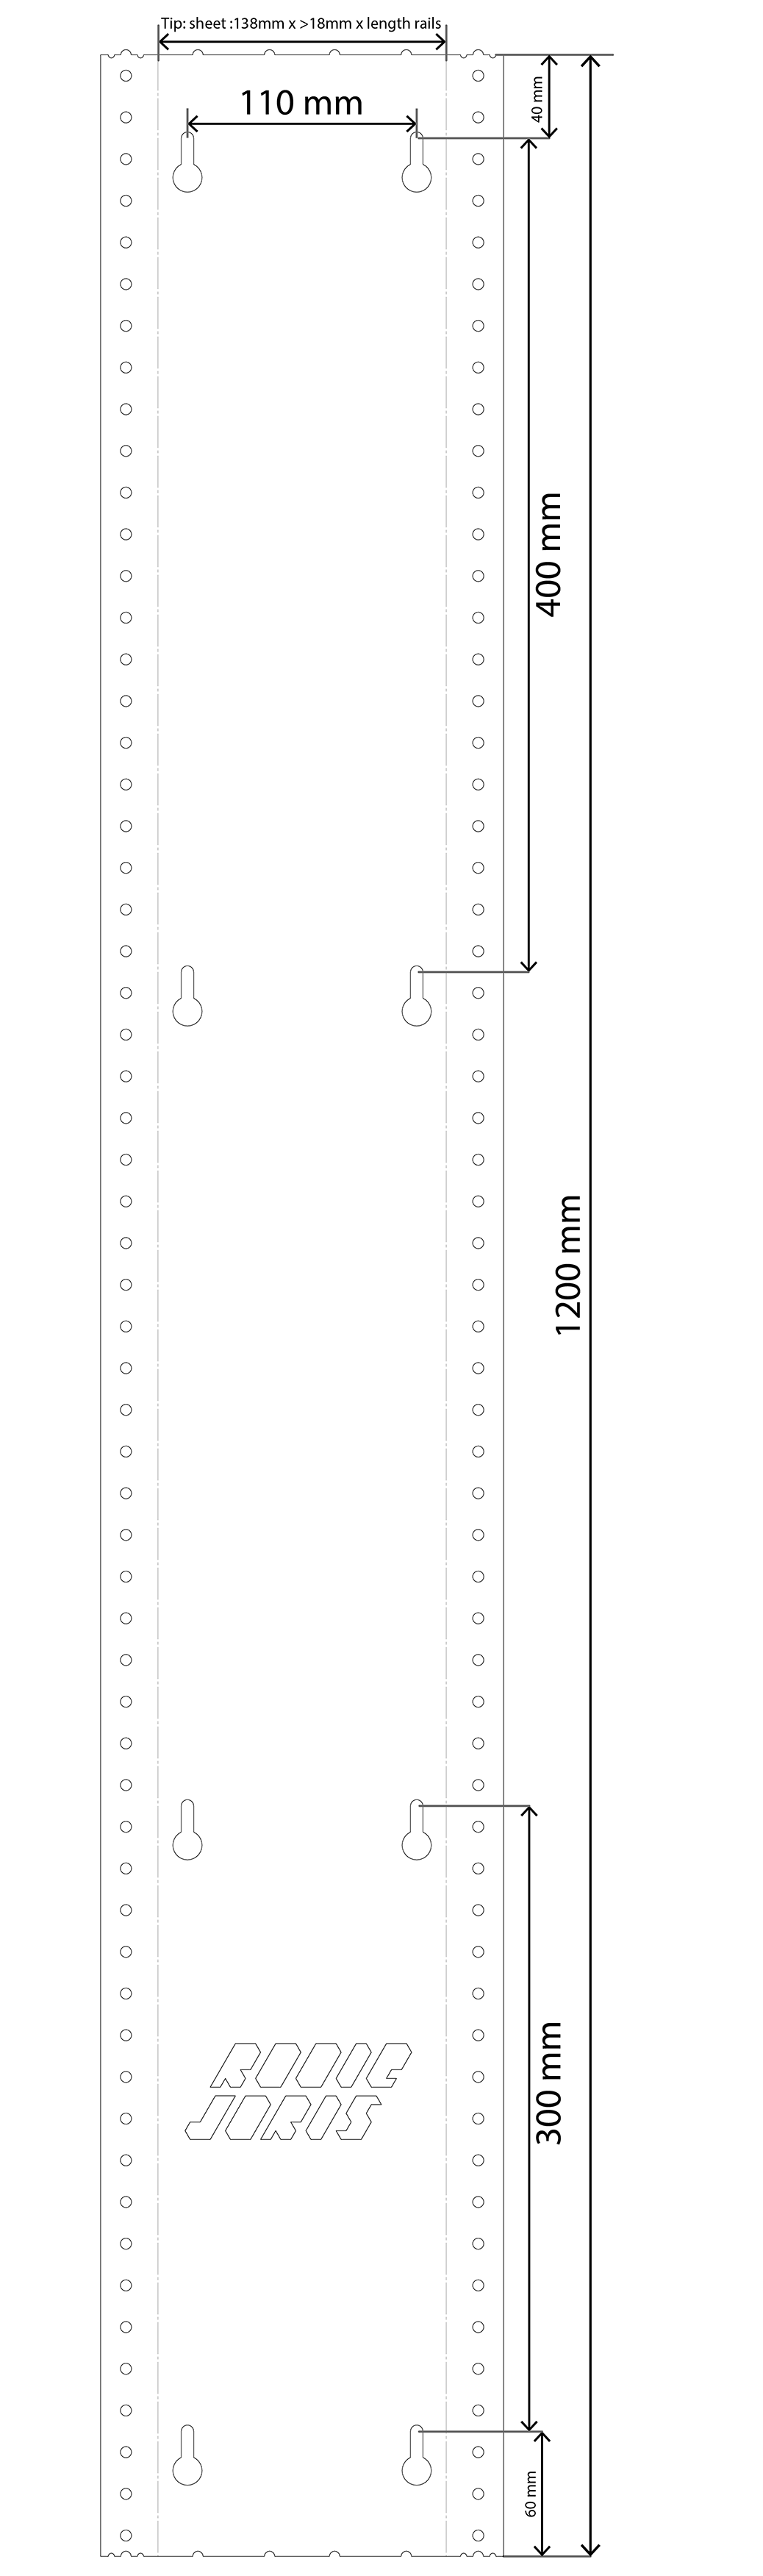
1. Rails
Needed
- 8x plugs per rail
- 8x screws per rail
screw holes:
110mm apart
bottom 300mm
400mm vertical grid
TIP: for better operation during printing, and if possible, mount a sheet of >18mm on the wall first. Size 138 x 1200mm, 138 x 2400 or 138 x 3600. Direct mounting is also possible.
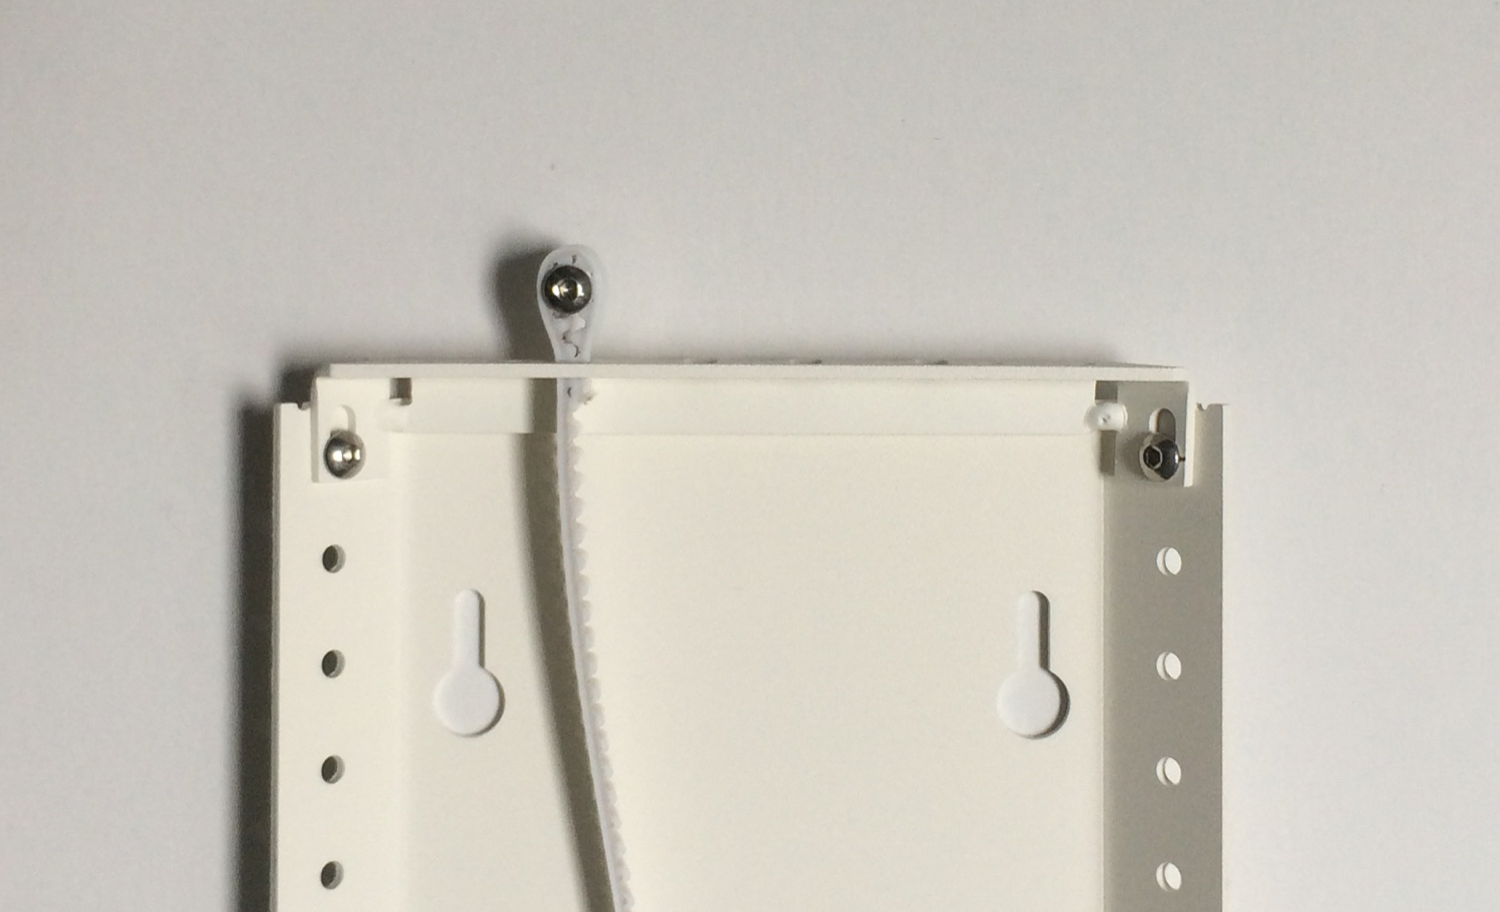
2. Belt holder
Needed
- 3x M5 x 10mm bolts
- 2x M5 nuts
- Timing belt
- 3D print: belt tensioner top
- 3D print: belt tensioner bottom
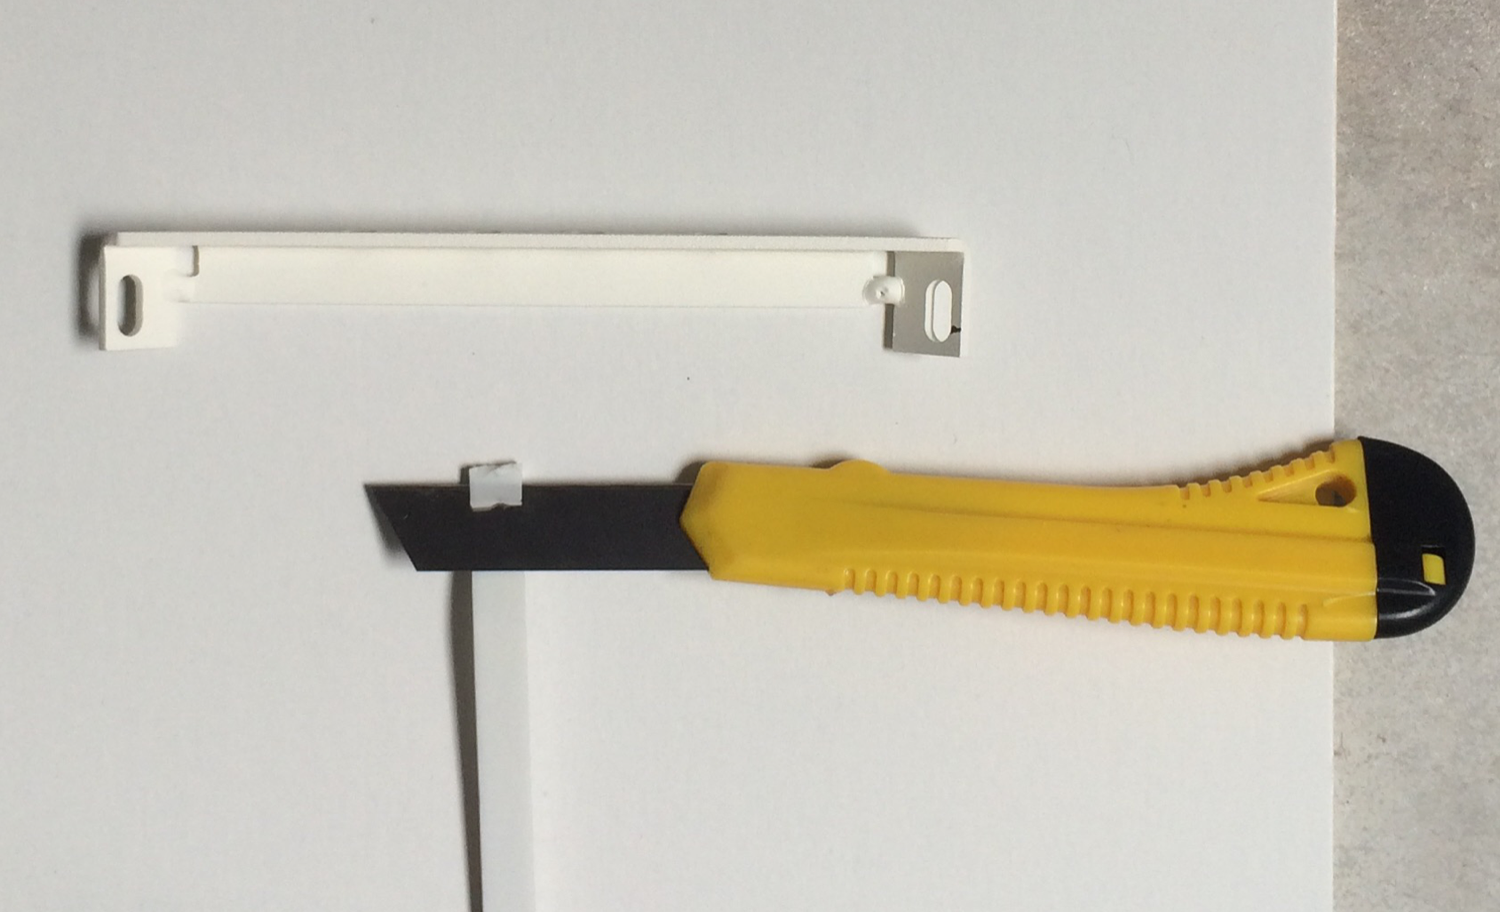
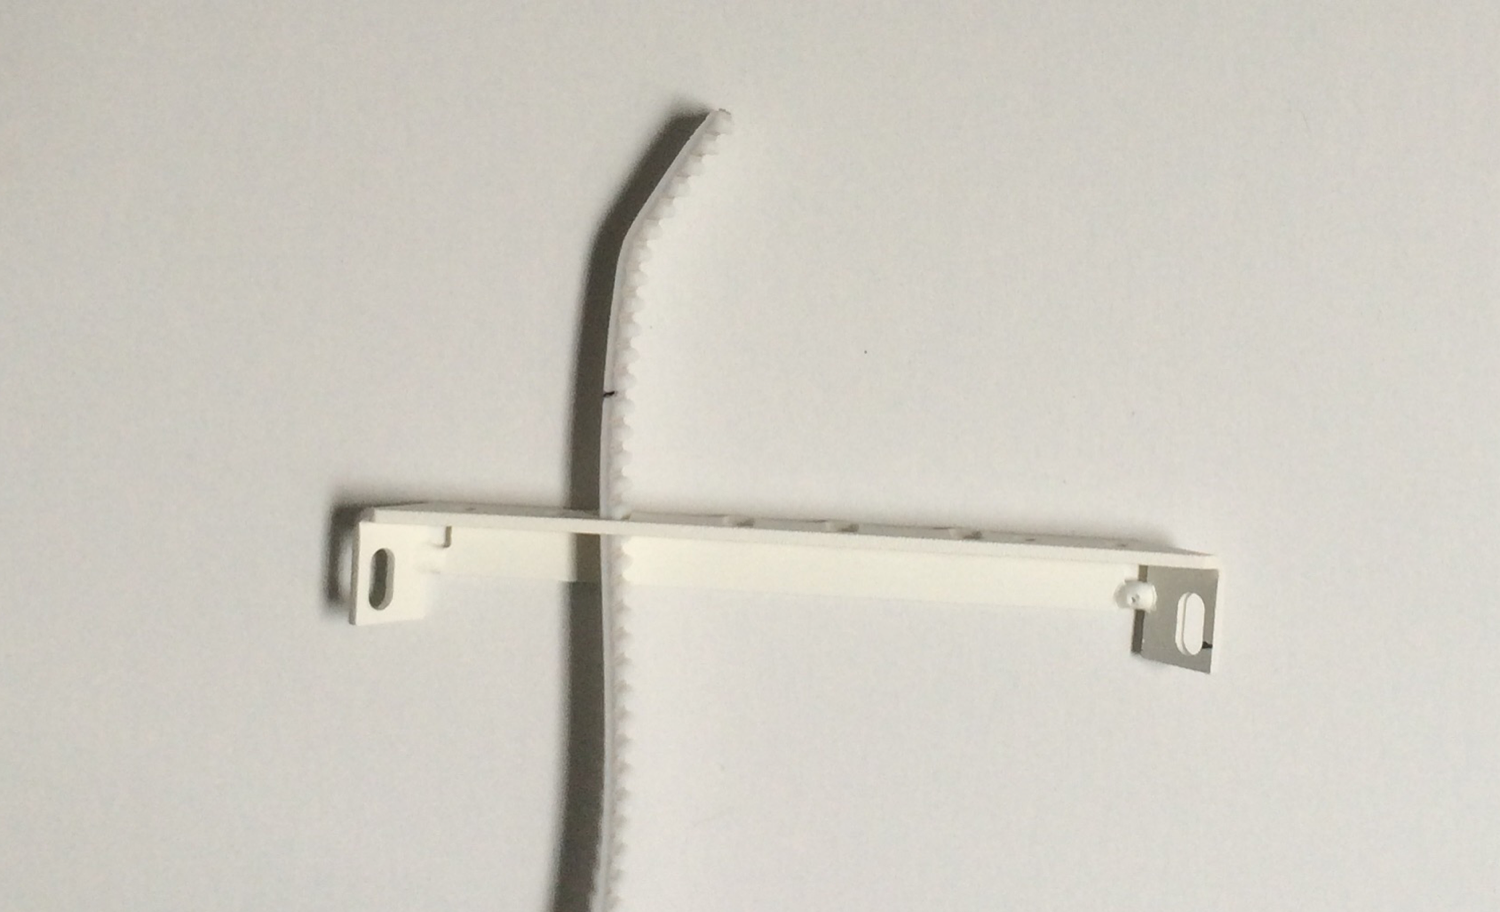
Mount cable tie to secure.
Mount the belt holder in the top holes of the rail with 2 10mm bolts and 2 nuts.
Place and mount cable tie to secure.
3. Connectors
Needed
XXL
- 2x Connector plates
- 8x M5 x 10mm bolt
Skyscraper
- 4x Connector plates
- 16x M5 x 10mm bolt
This is only applicable on the XXL & Skyscraper kits.
First mount the bottom rail to the wall, then place the next rail, mount the connector plates and finally tighten the screws on the wall.
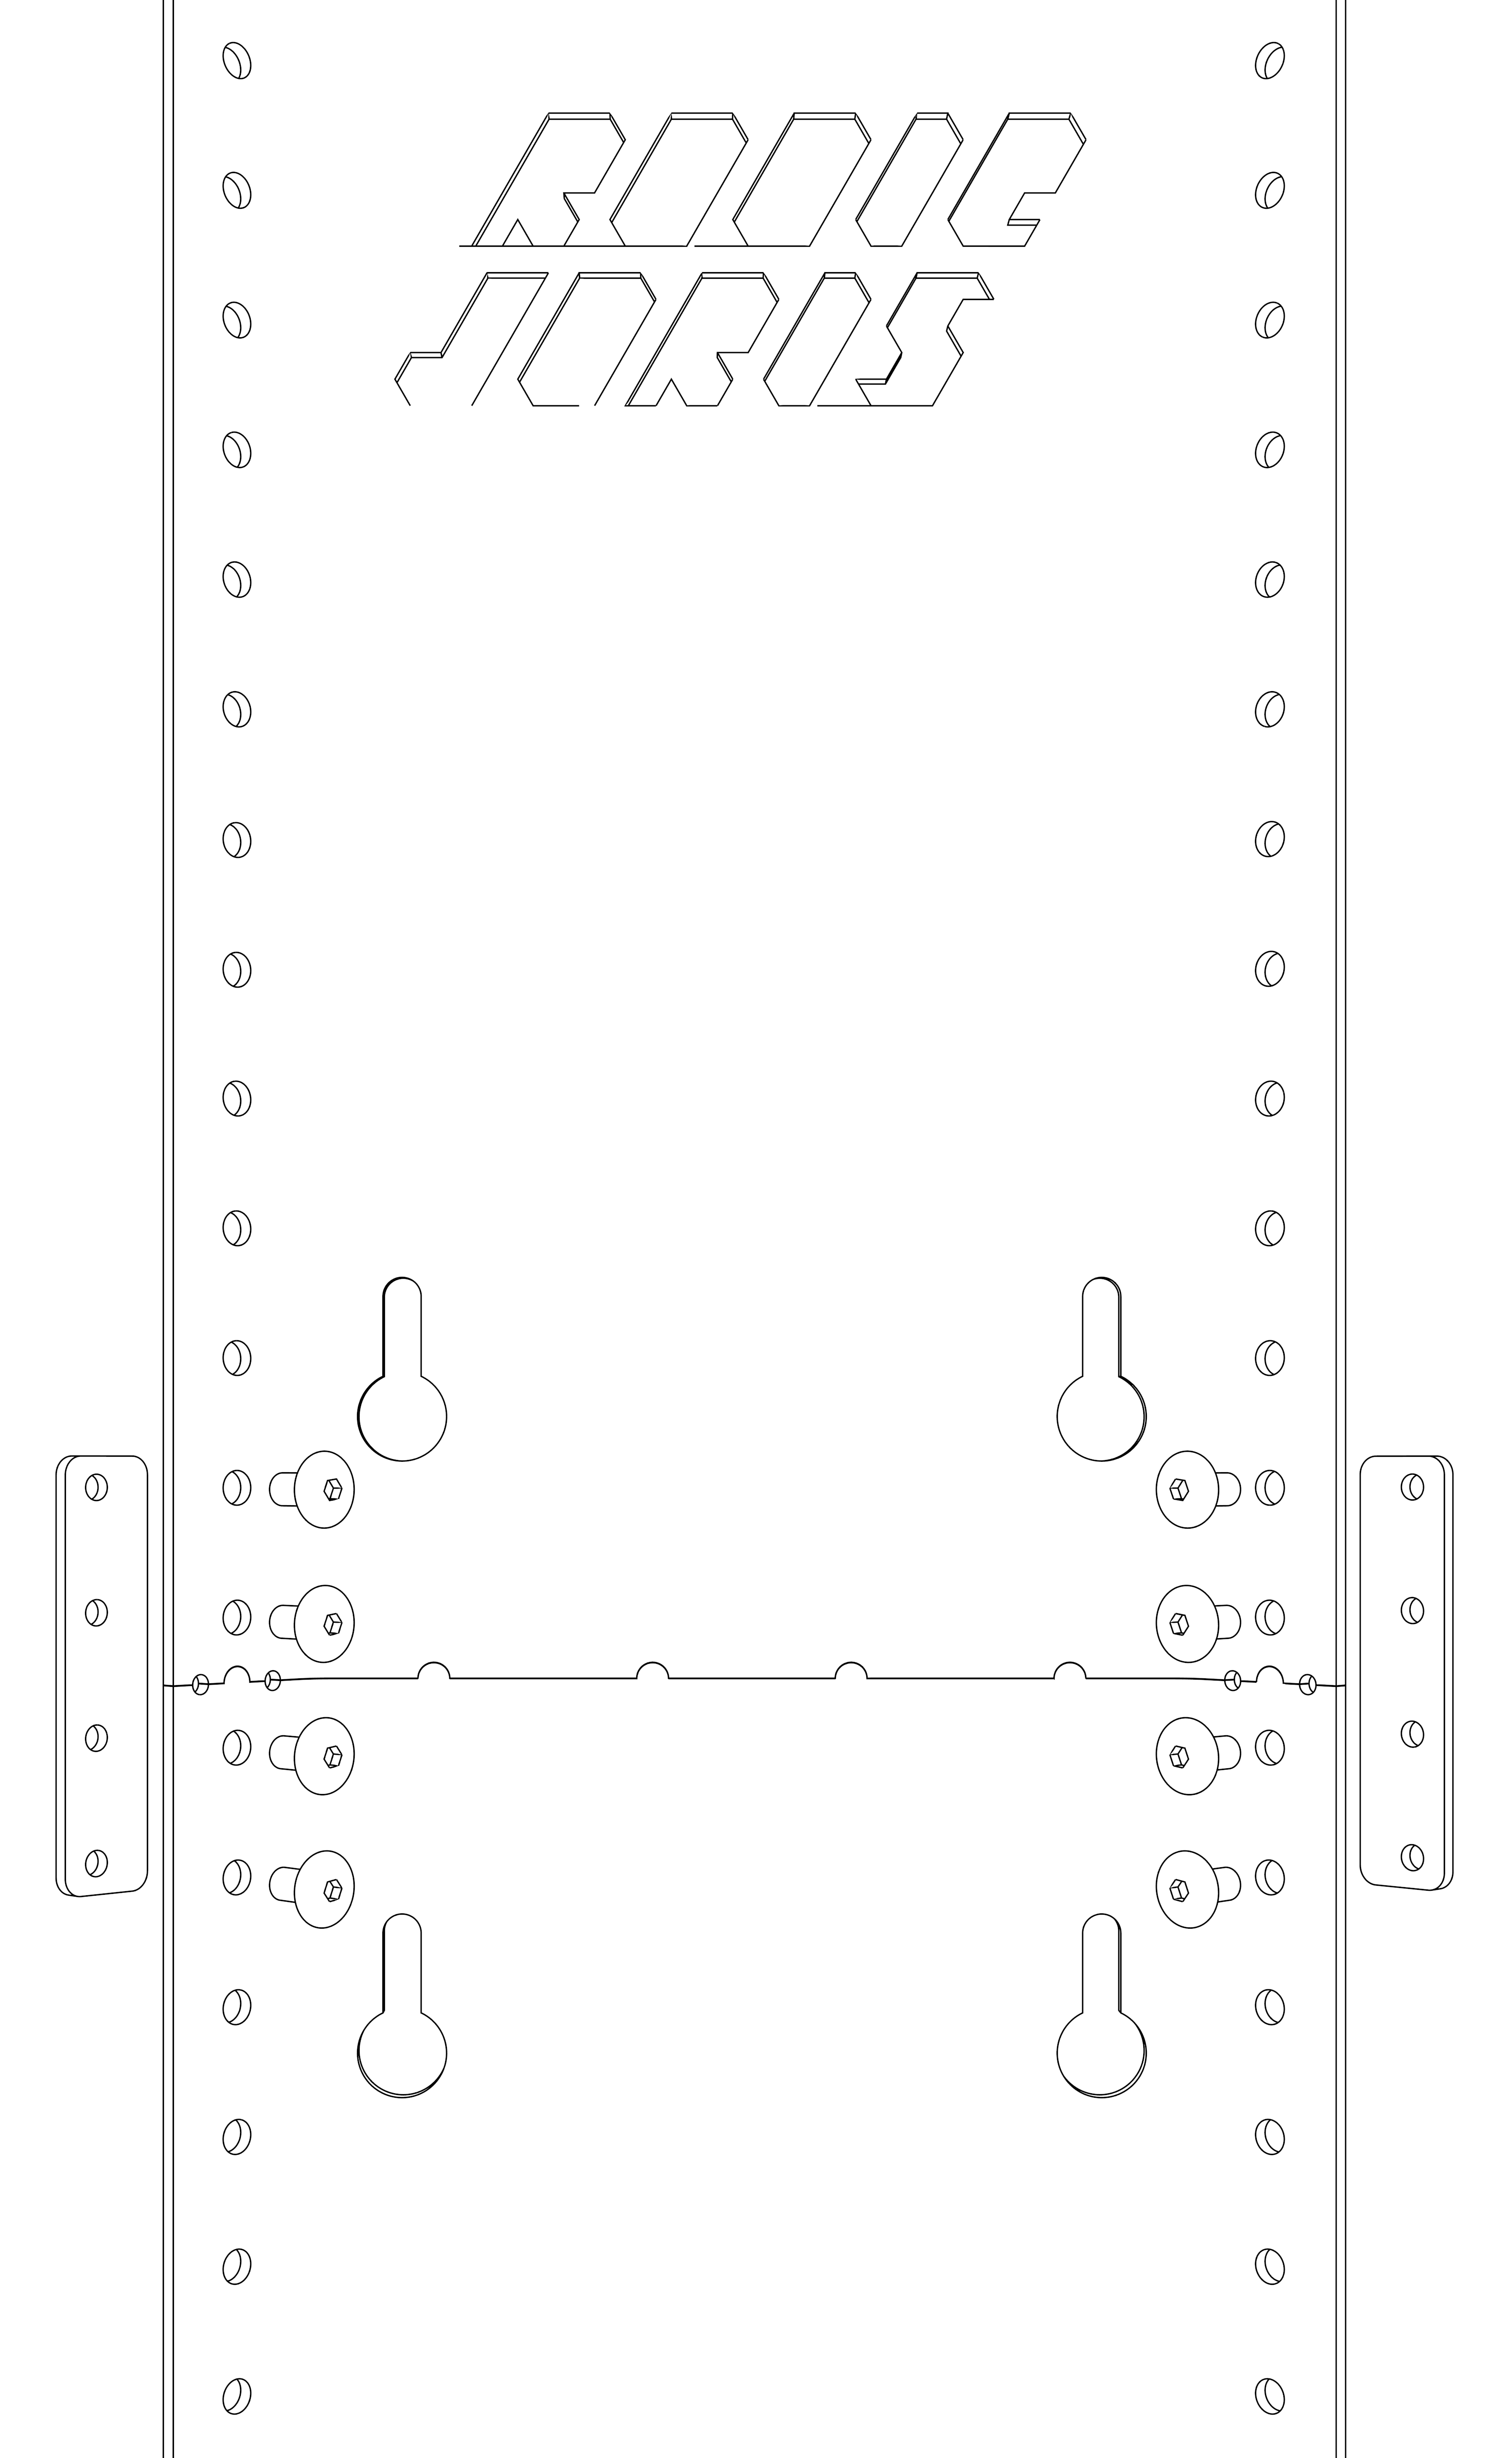
4. Bed
Needed
- Acrylic bed
- 5x M5 x 35mm bolt
- 4x M5 washer
- 4x M5 spring washer
- 4x Locknut
- Bed holder
- 5x butterfly nuts
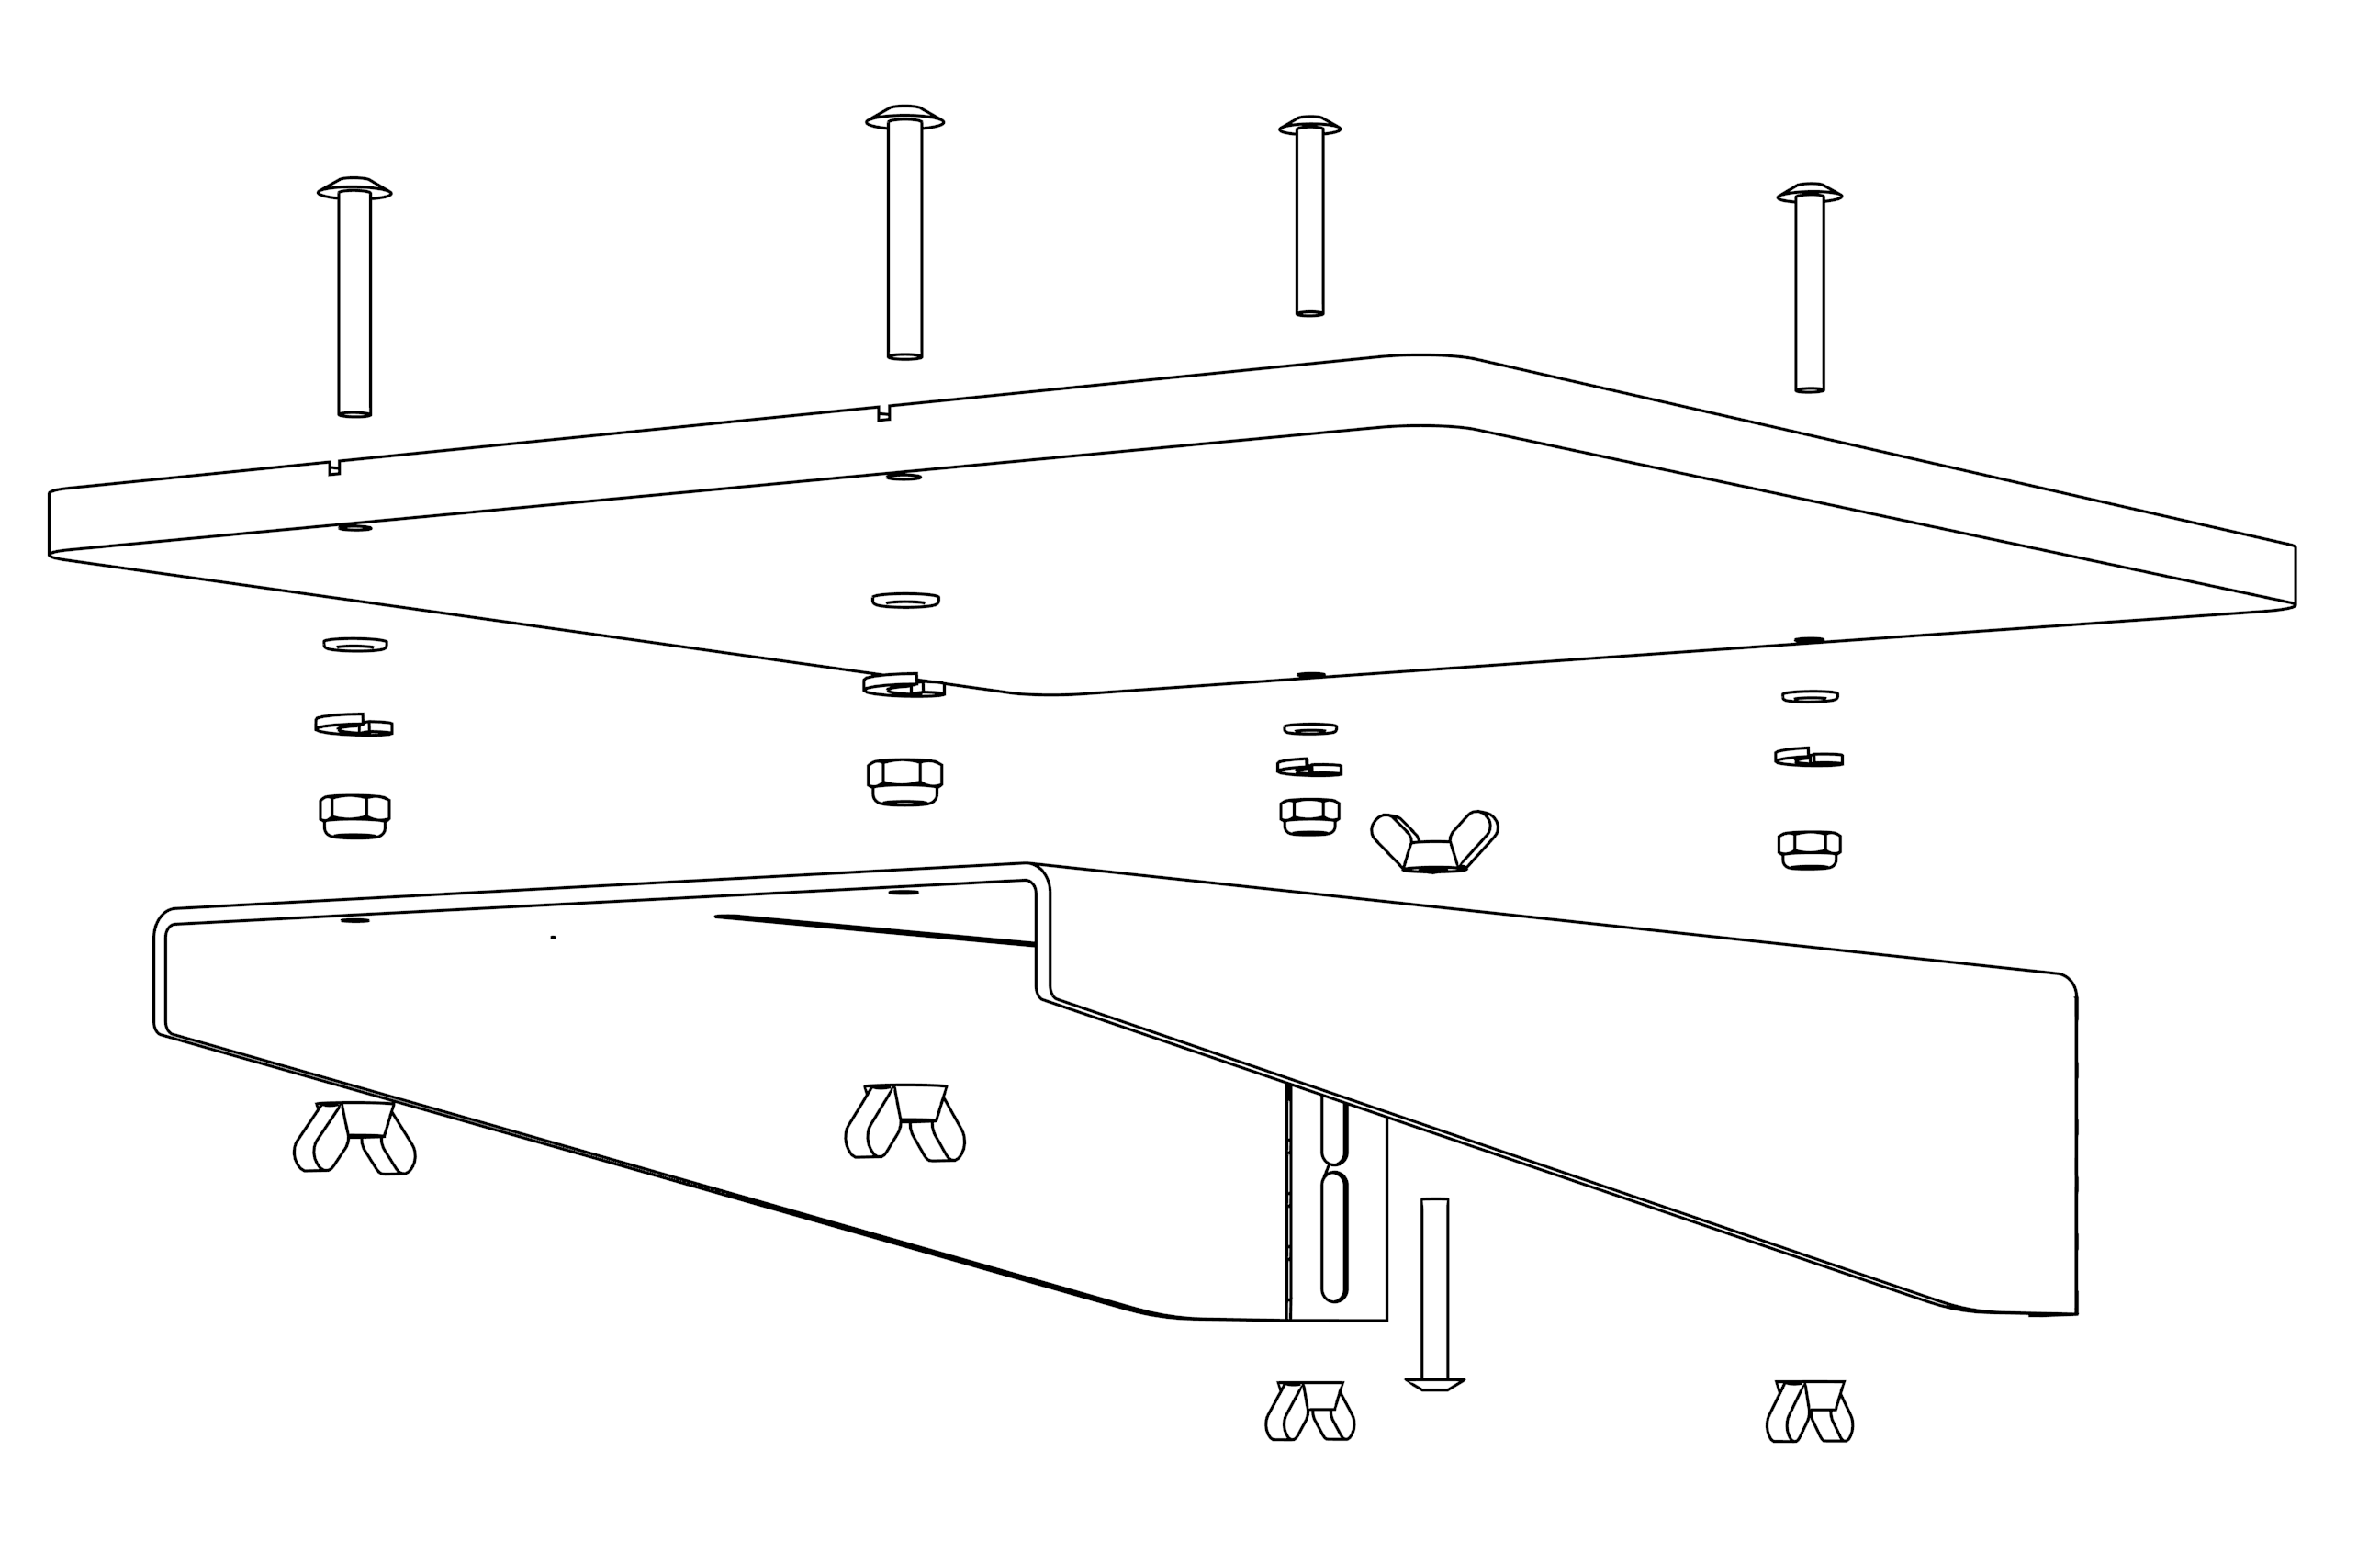
Then screw the bolts about 5mm in the metal platform. Do this one turn at the time for each screw. These screws can be secured with a butterfly nut.The Z-endstop screw is a M5 x 35mm bolt screwed in from the bottom. Secure with a butterfly nut.Now mount the bed with two M5 x 10mm bolts and nuts on each side on the bottom of the rails.
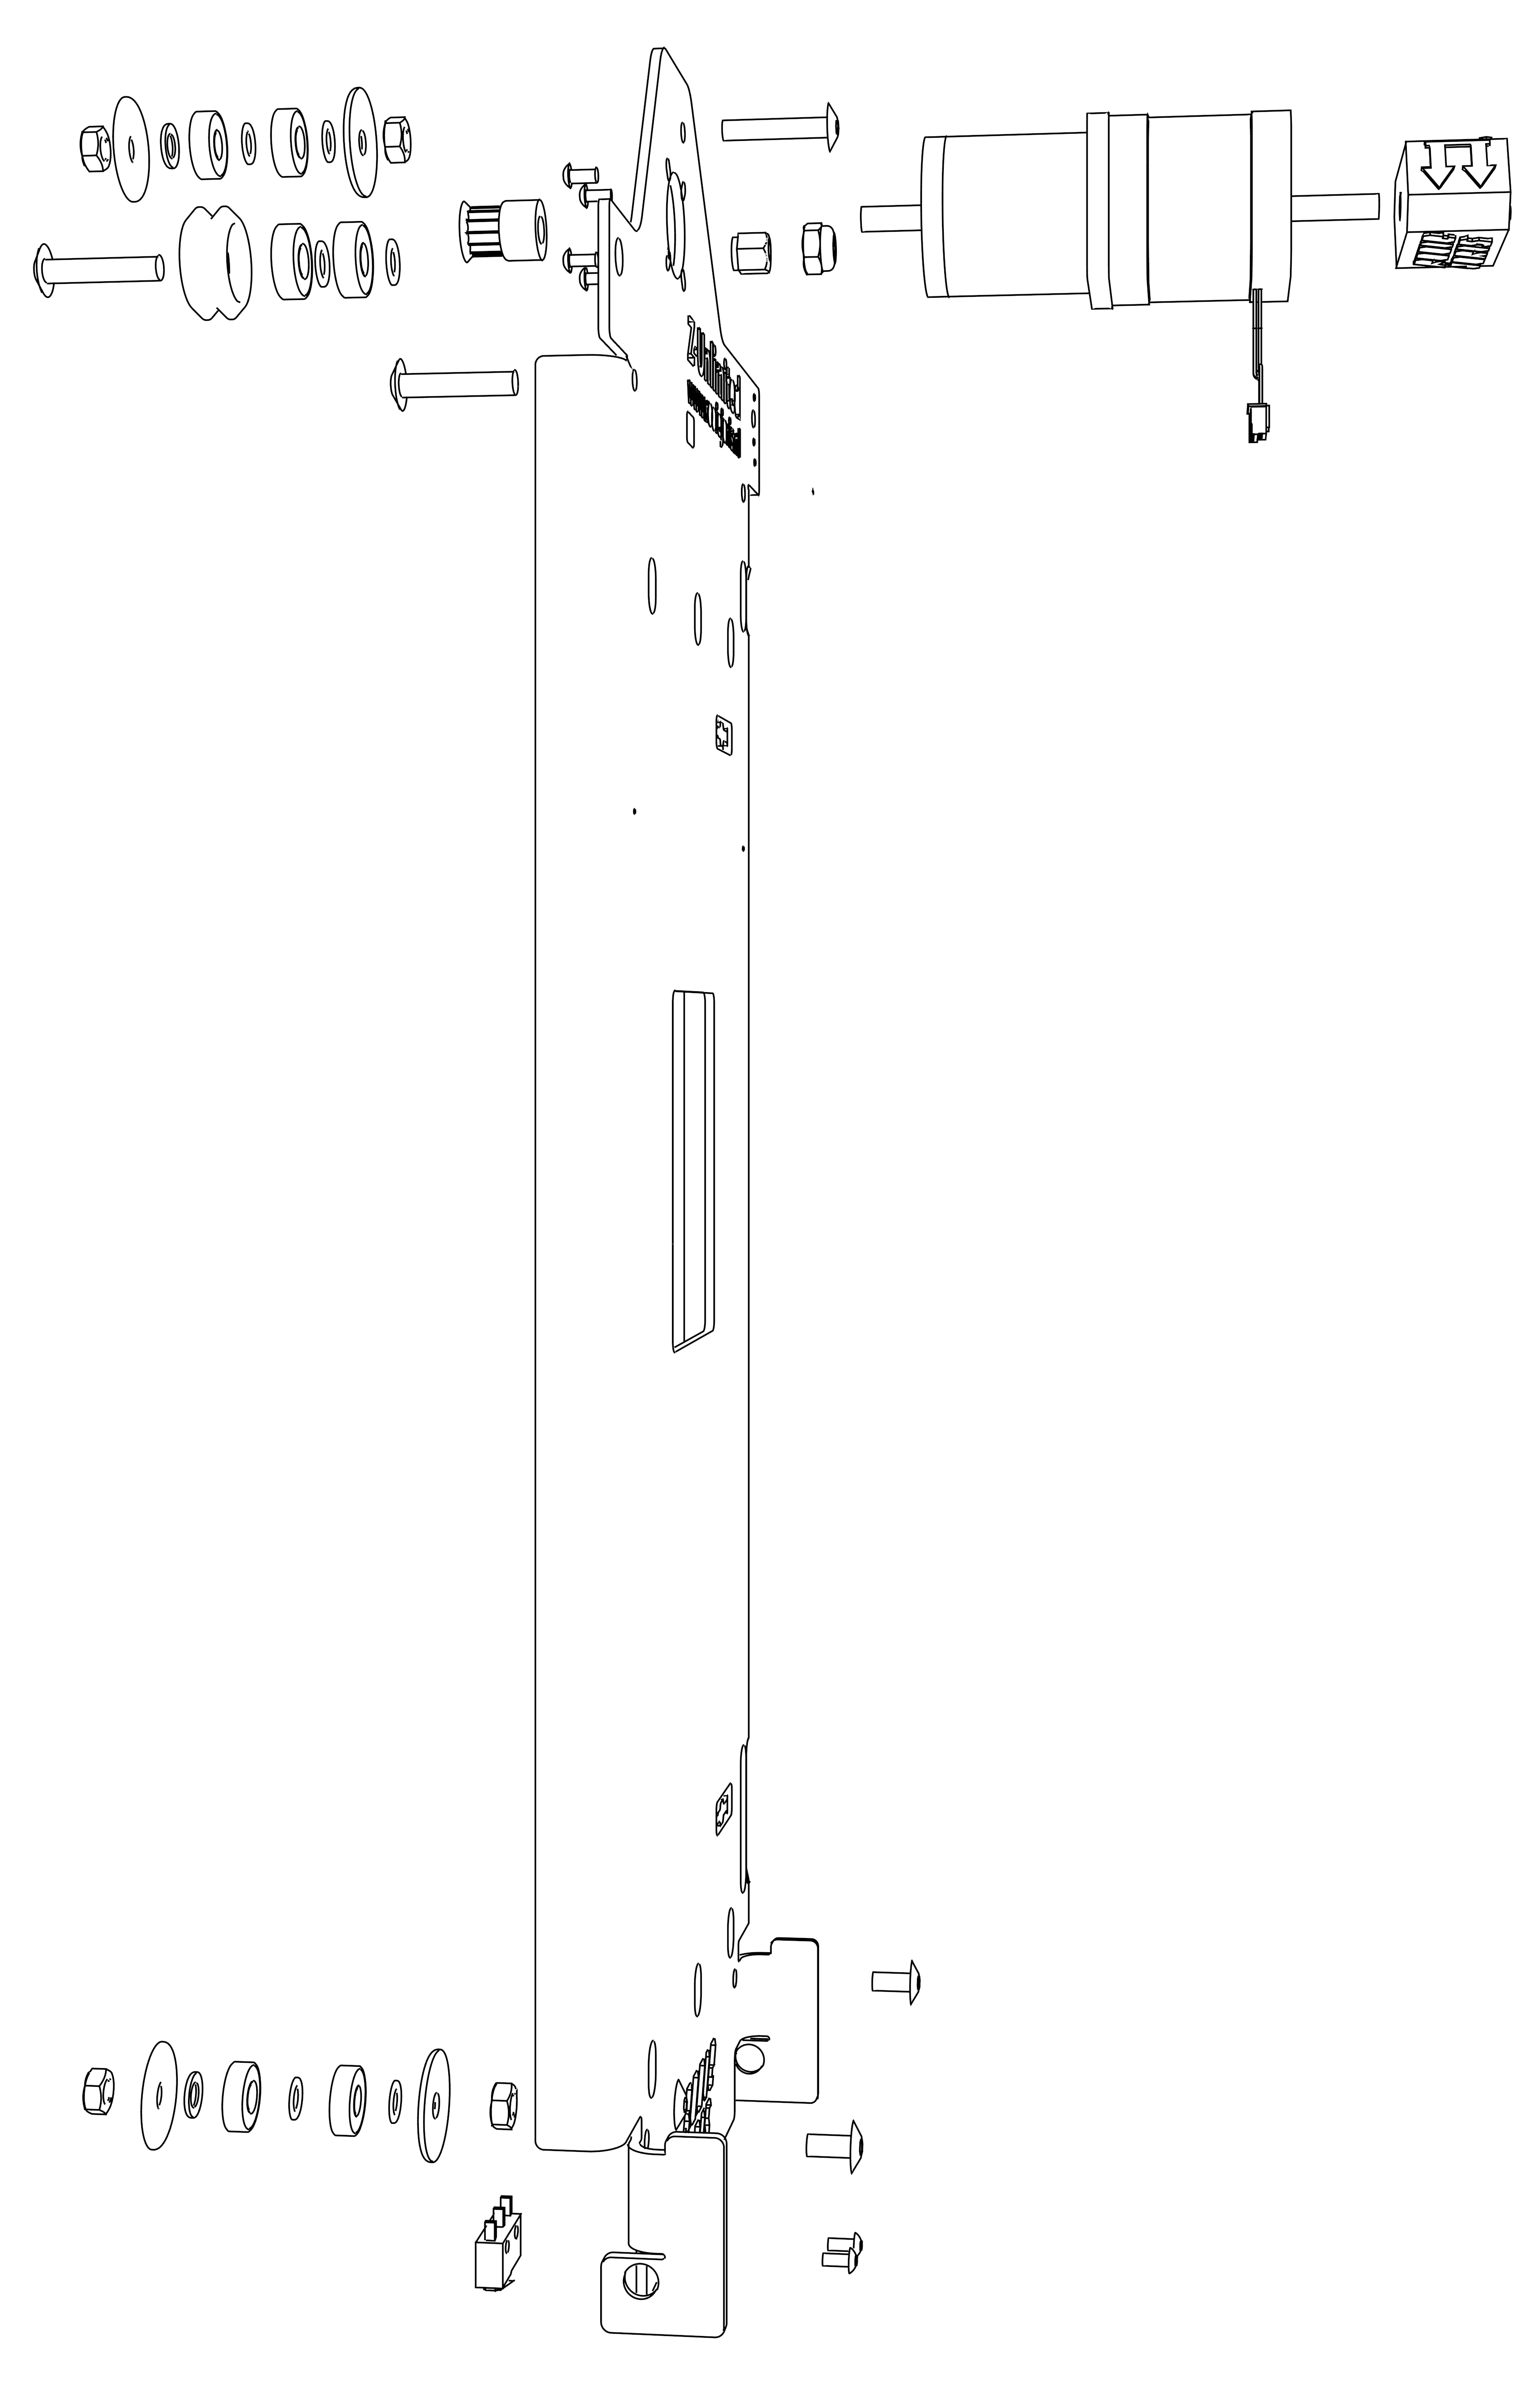
5. Carriage
Needed
- 4x V-Wheels kit from OpenBuilds
- 10x M5 washer
- 4x M5 x 25mm washer
- 4x Bearing
- Stepper motor
- Motor wire
- End-stop
- 2x M5 x 10mm bolt
- 8x M5 x 25mm bolt
- 5x M5 nuts
- 3x M5 Locknut
- 6x M3 6mm bolt
- Timing Pulley + 2x set screw (black)
- 3x Excentric Spacers
- 3D print: Knob
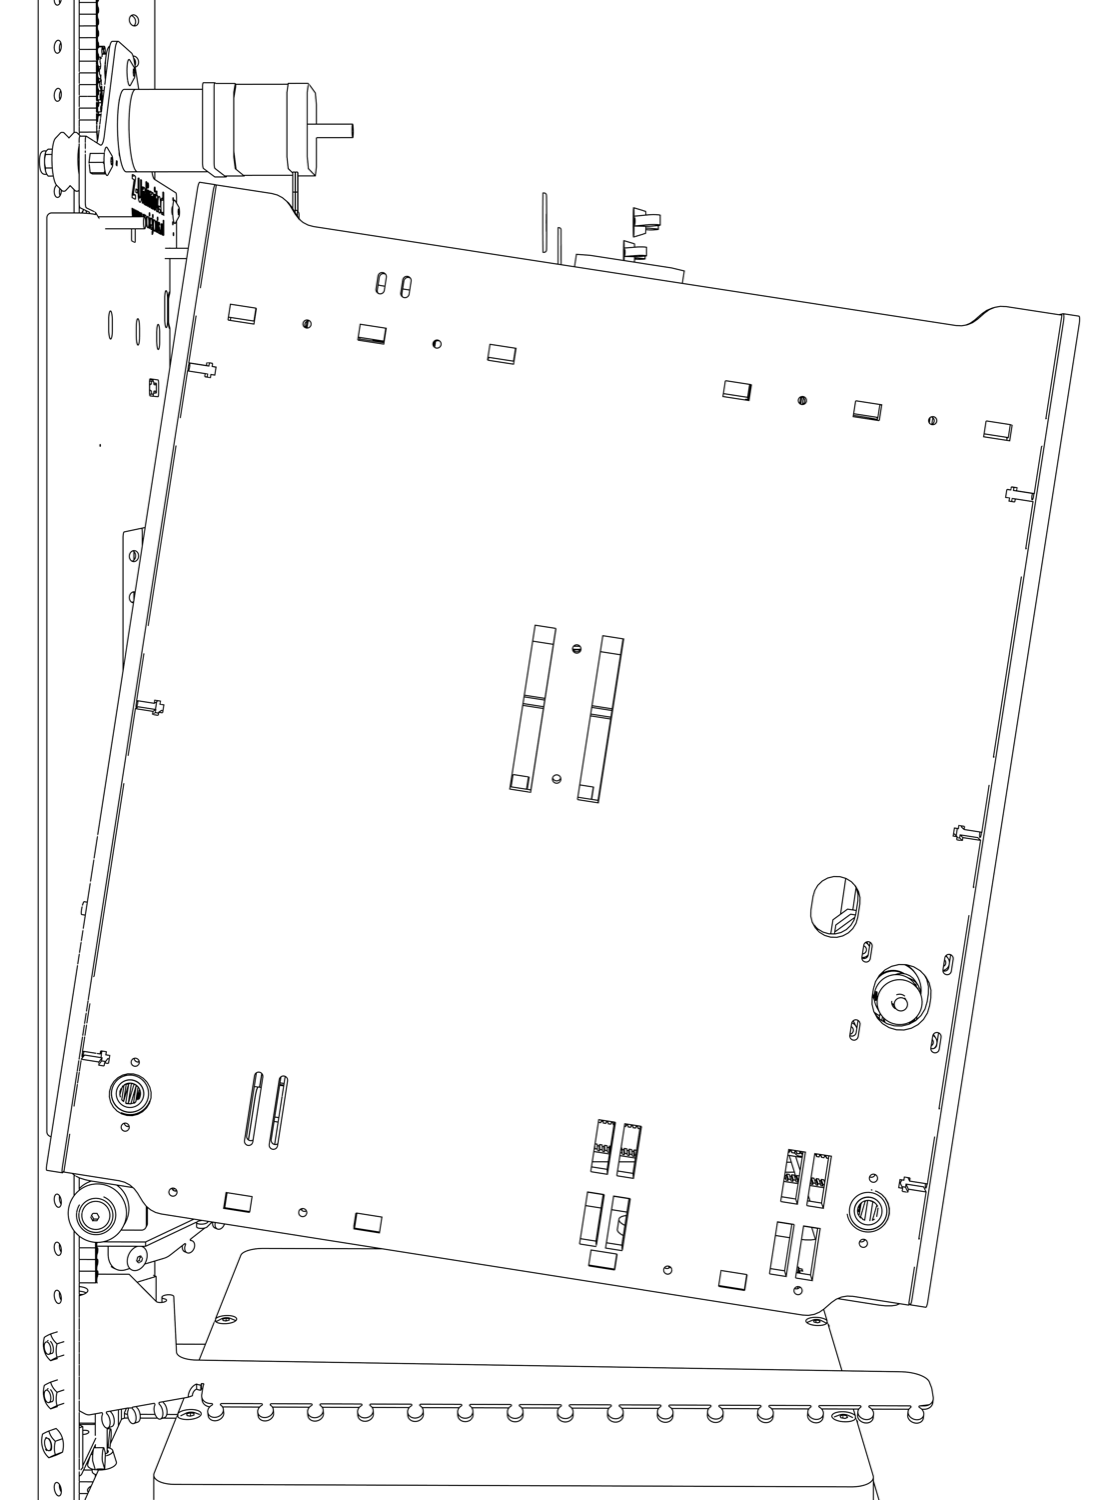
This sub assembly has the most parts. Start with preparing the Open Builds V-Wheels. Make sure there is a washer in between the bearings!
Top left: Place the eccentric spacer, then place a M5 x 25mm bolt then a washer and then the V-Wheel. Tighten this with a locknut on the back.
Bottom left and right: Take a M5 x 25mm bolt, then the V-Wheel and then a washer. Place the eccentric spacer. Tighten this with a locknut on the inside.
Top right: Screw a M5 x 25mm bolt tight in the carriage from the front. The last V-Wheel has to wait until the carriage is mounted on the rail.
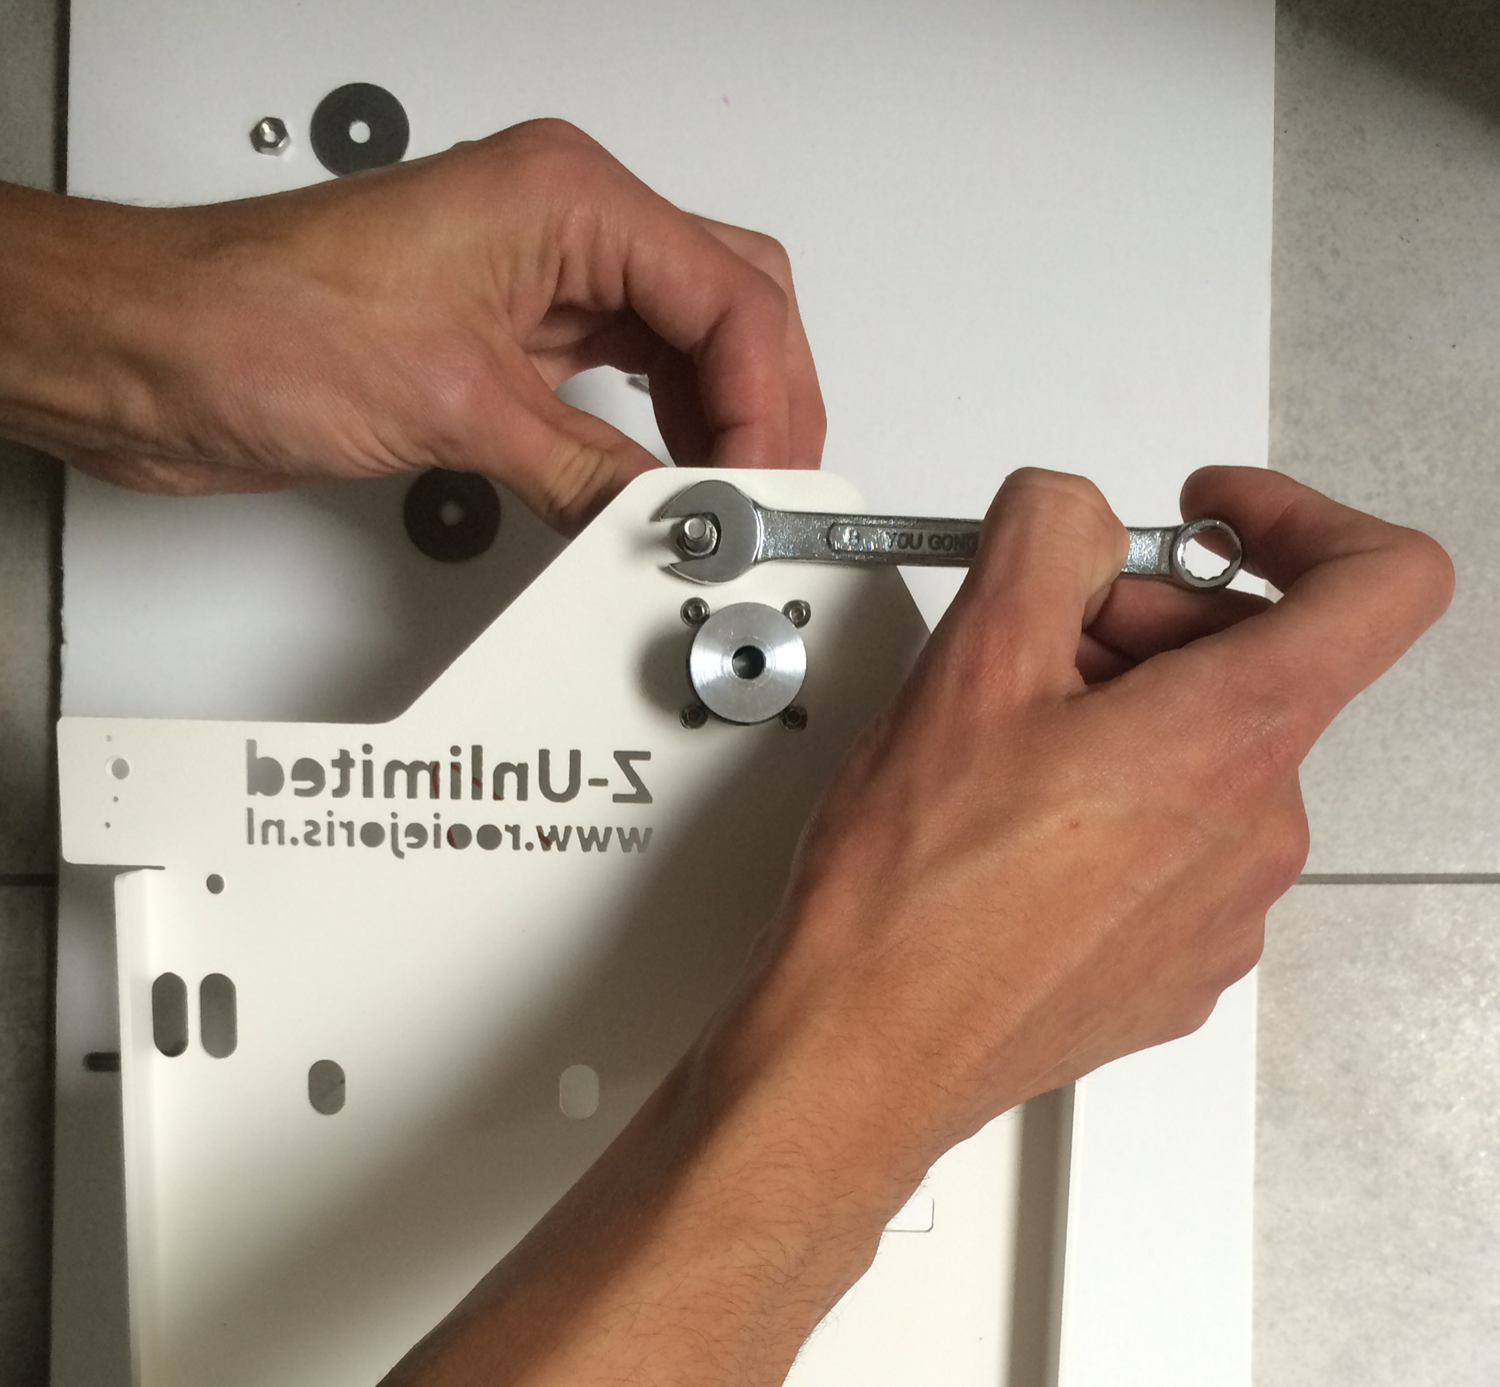
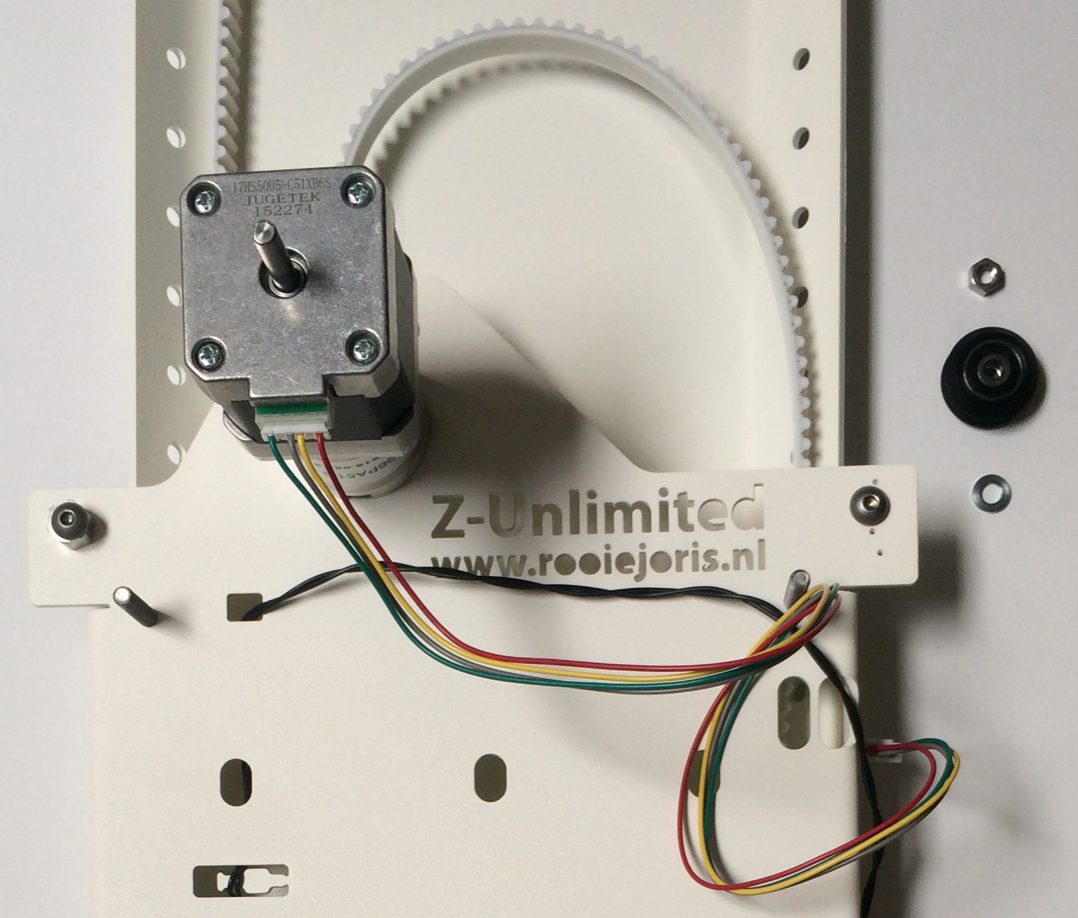
Mount the timing pulley on the geared stepper motor axis.
Mount the geared stepper motor with the four M3 x 6mm bolts.
For the idler pulleys take a close look for the washers order in the drawing. Then screw a M5 x 25mm bolt tight in the carriage, secure them with a nut from the other side.
Mount two M5 x 25 bolts from backside, this will secure the Ultimaker when you mount it on the carriage later.
Mount the endstop on the back with two M3 x 6mm bolts from the front.
Weave the cable throught the cable guides to the top and through the square hole to the front.
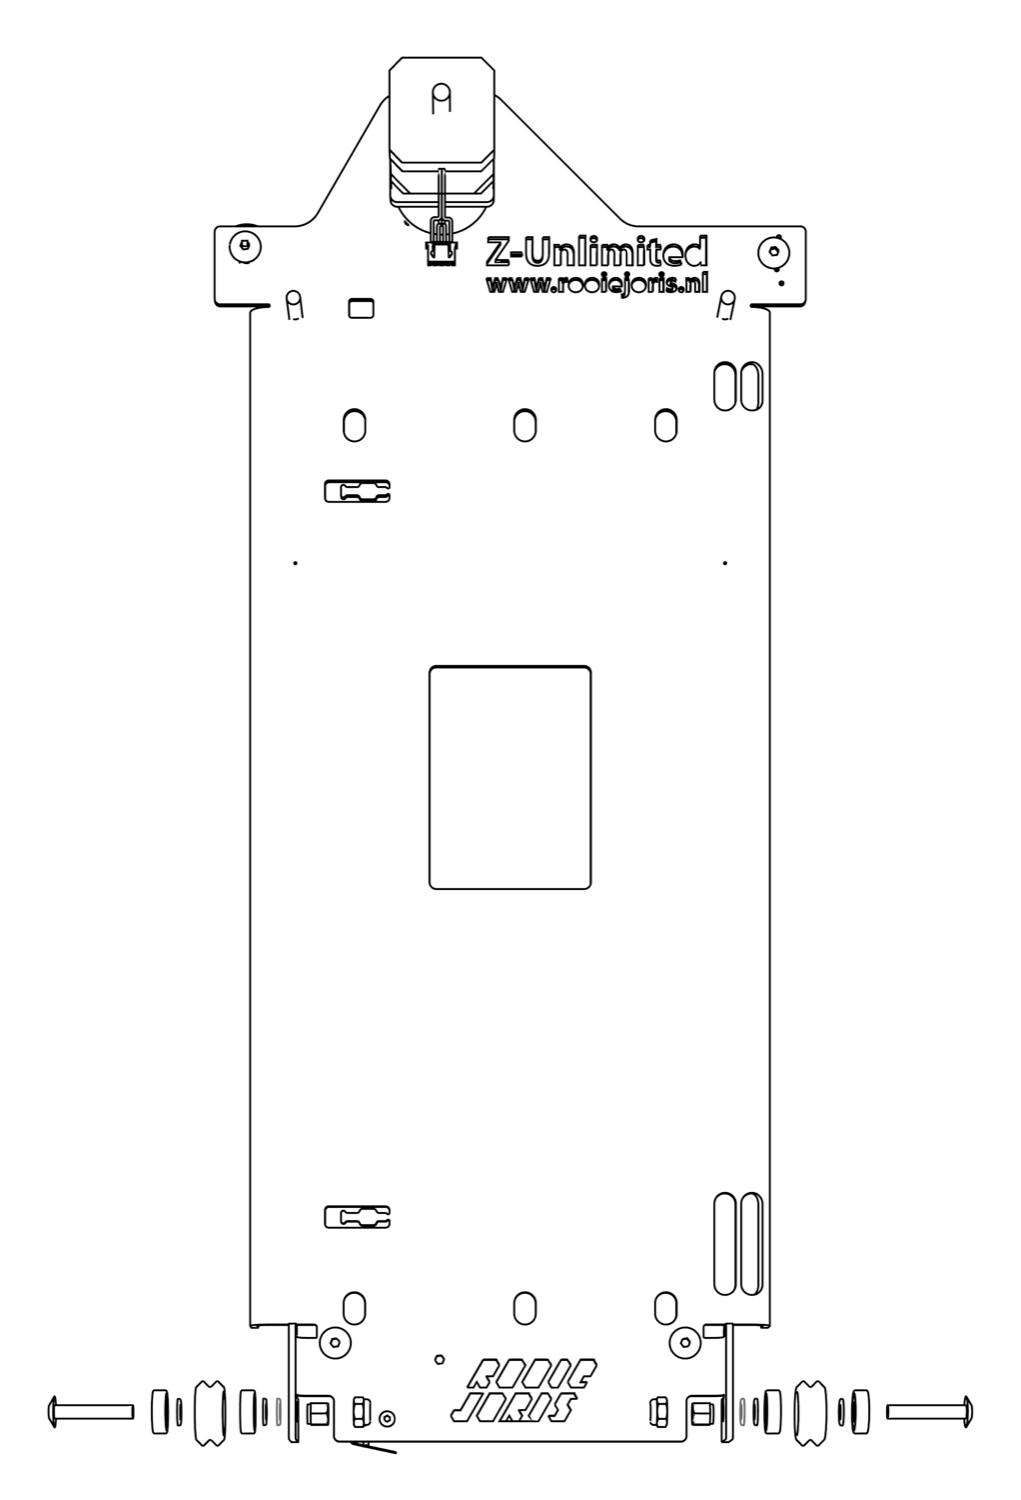
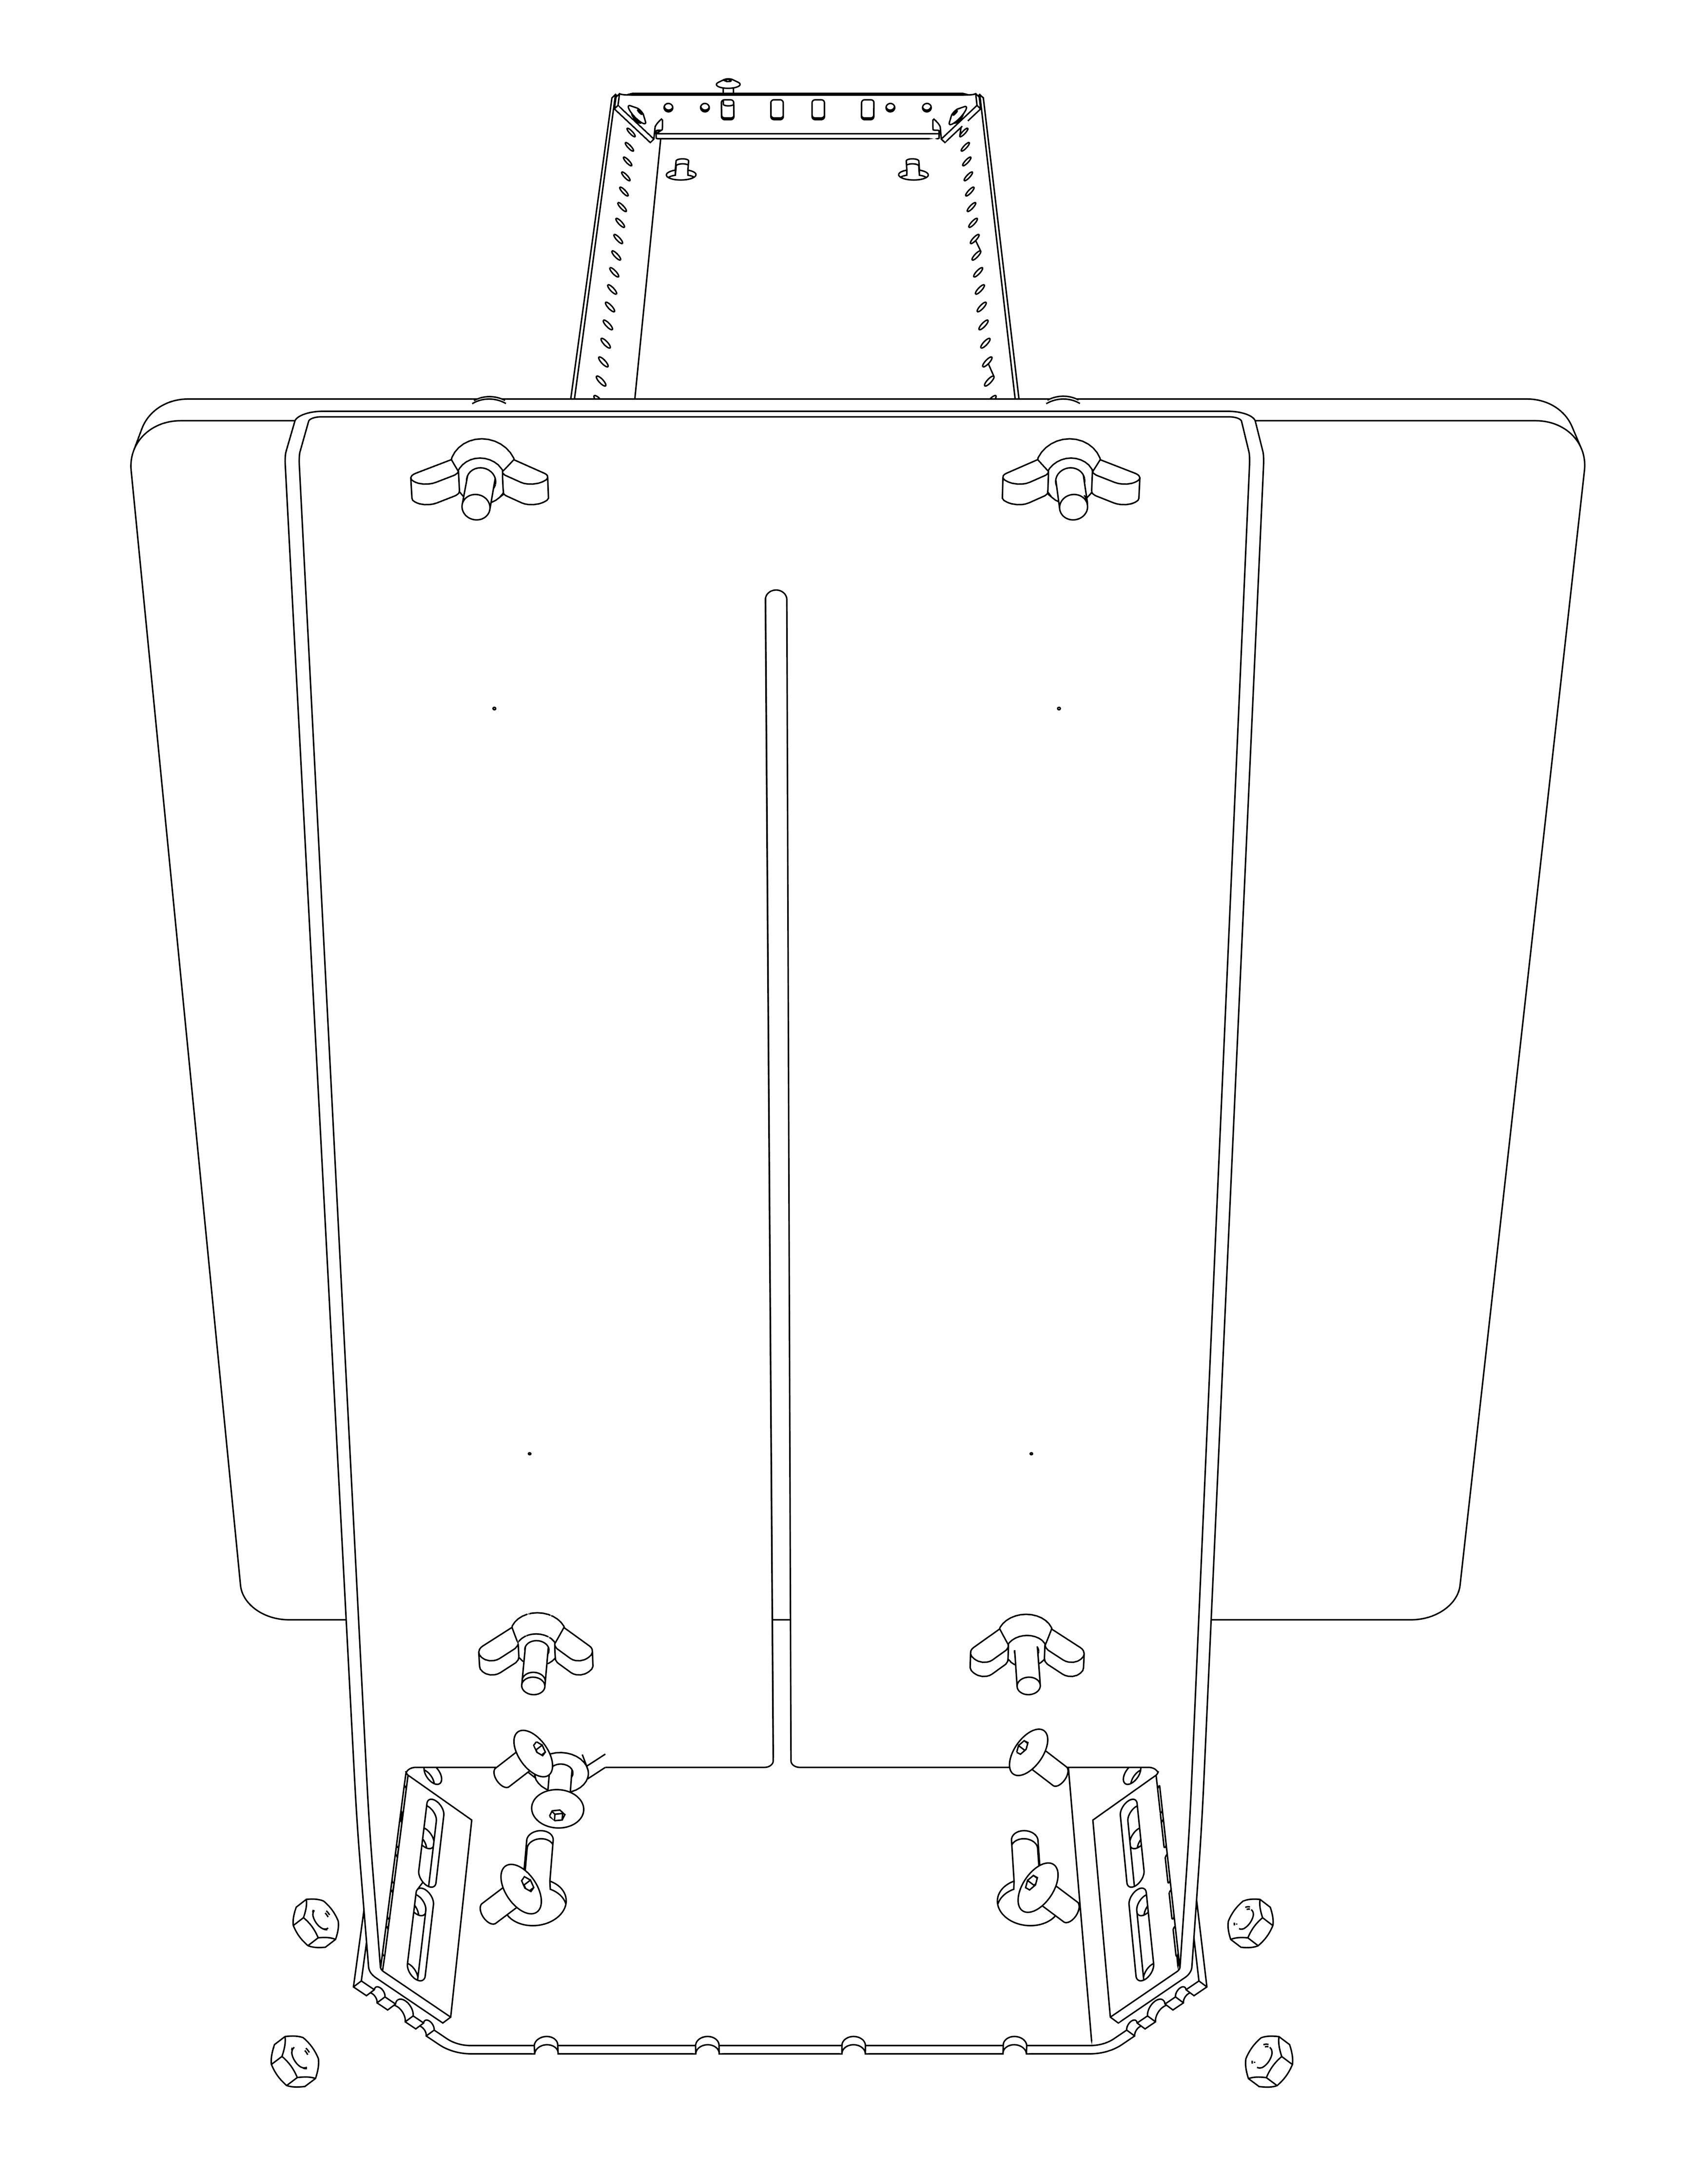
6. Mount Ultimaker
Needed
- Ultimaker
- 2x M5 x 25mm washer
- 2x M5 Butterfly nut
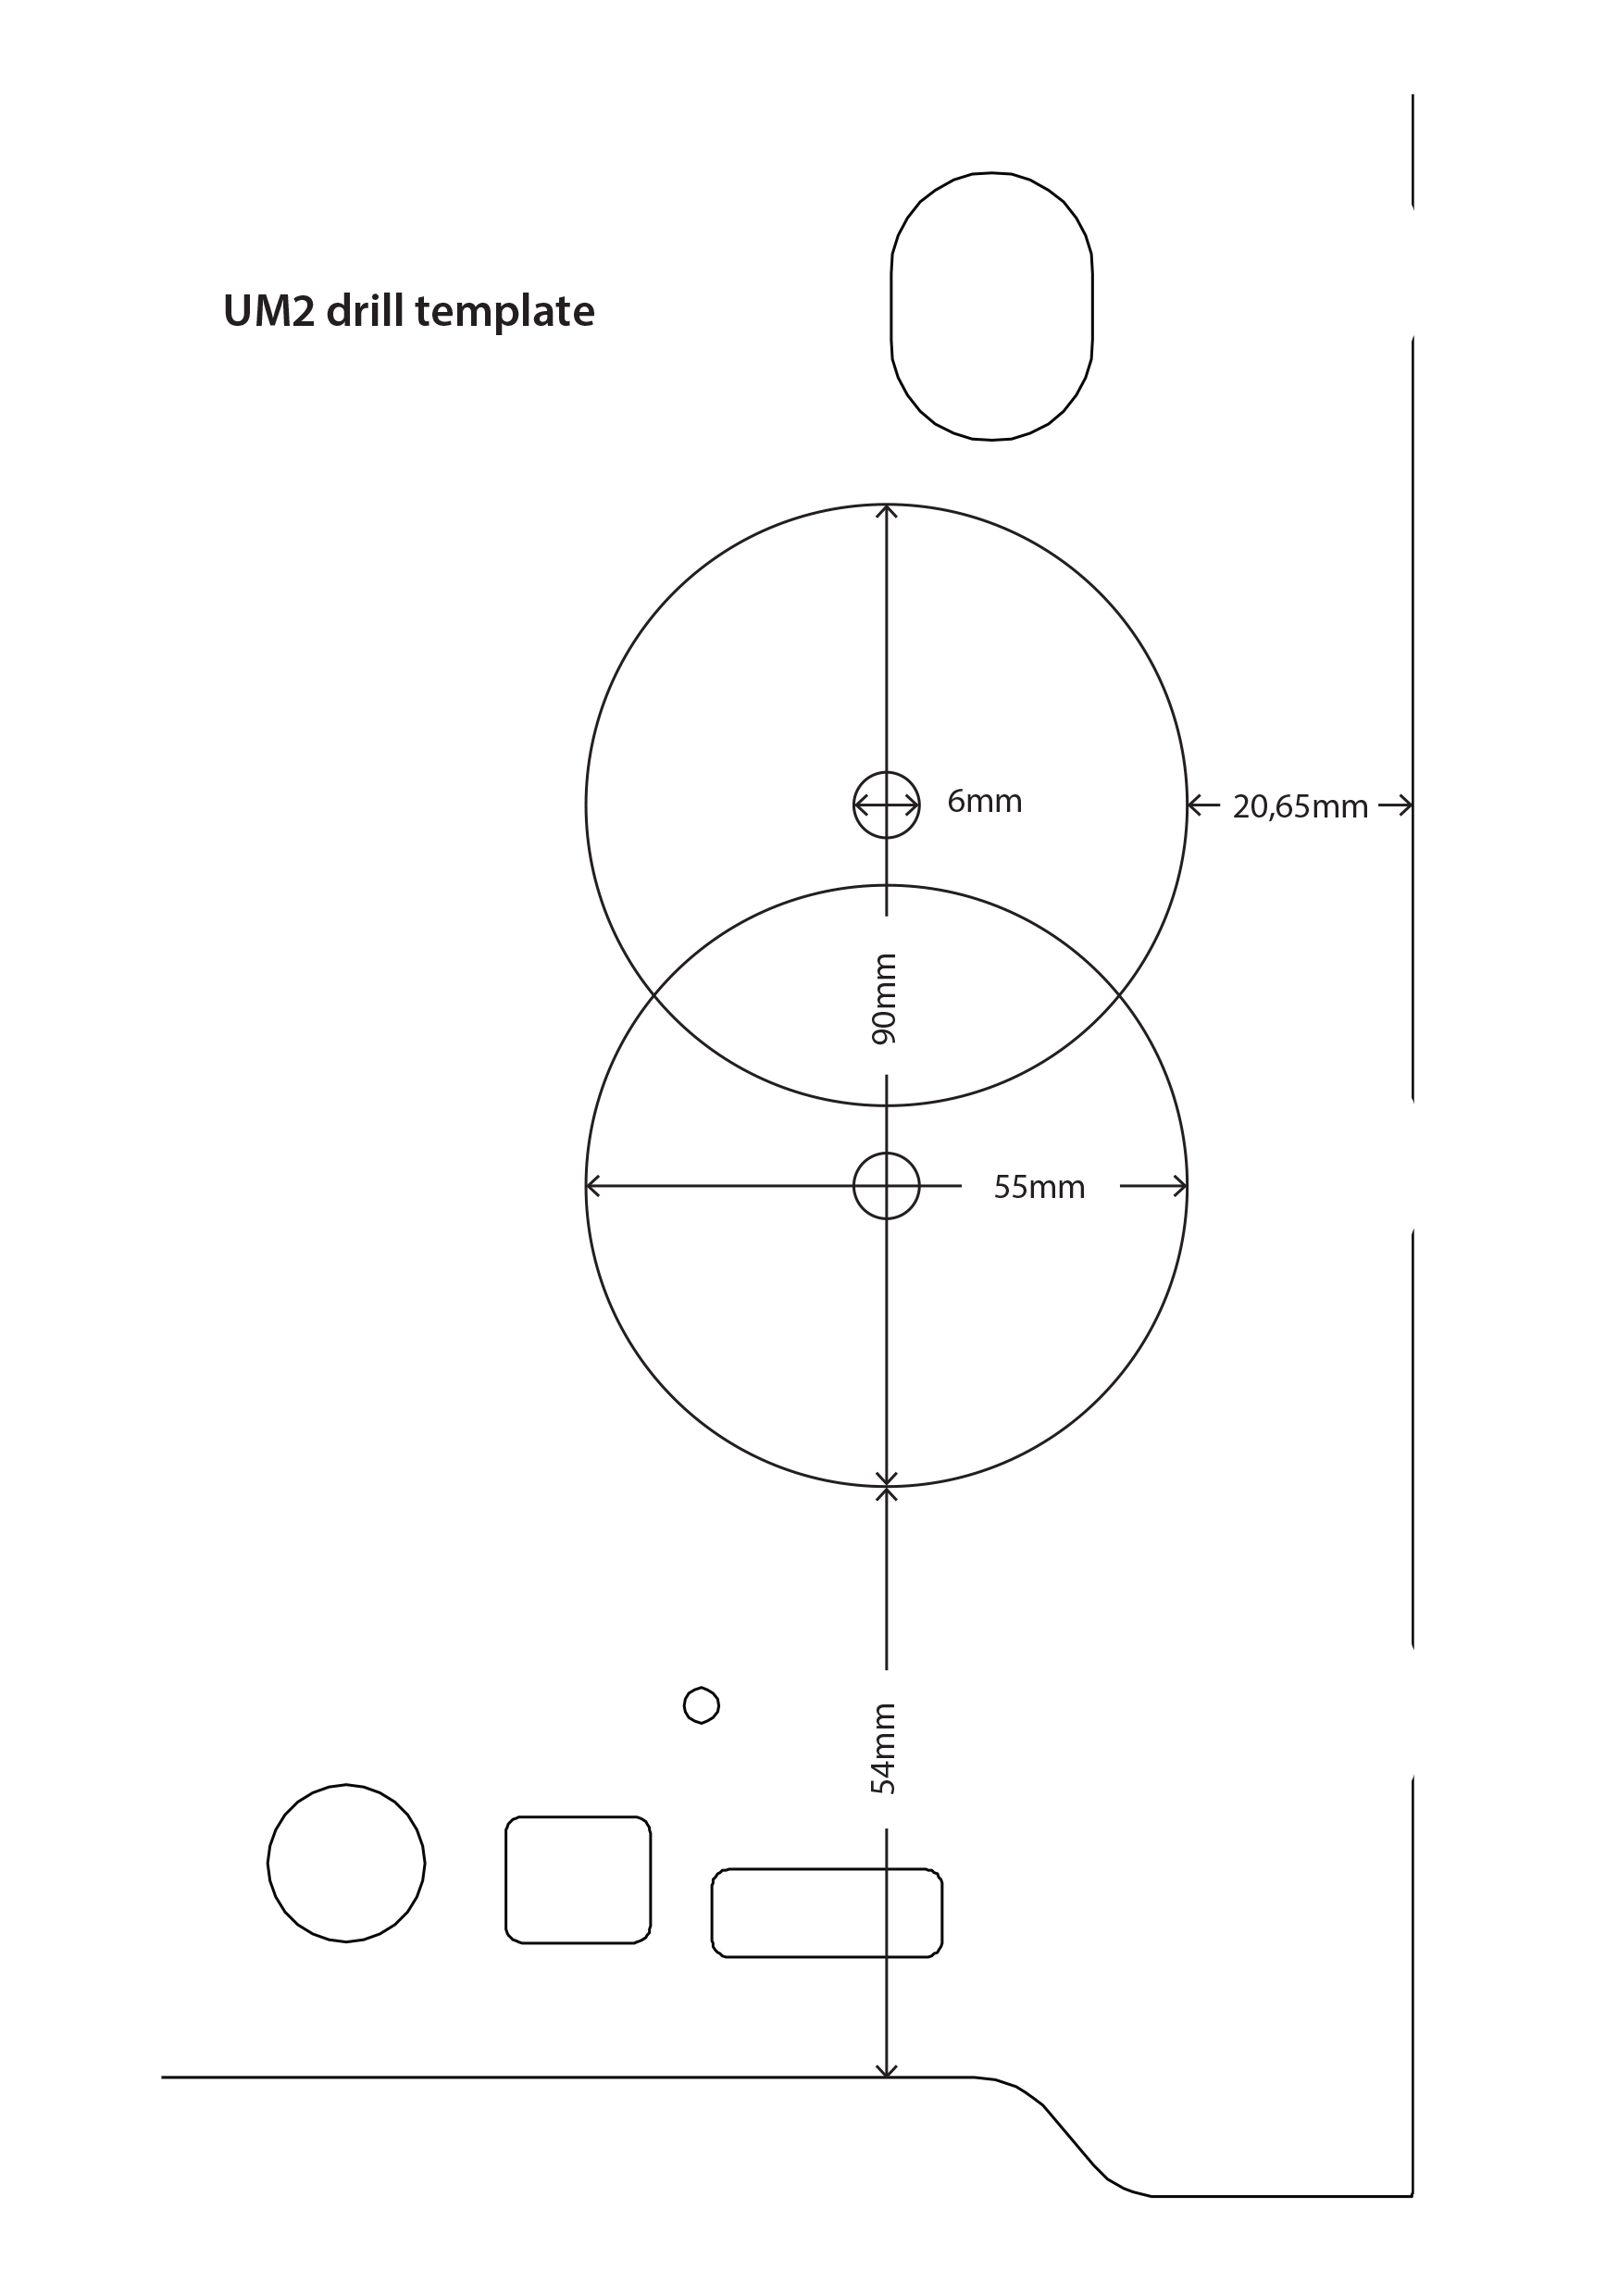
- UM2 drill template
Preparing the Ultimaker is slightly different for the Ultimaker 2 and Ultimaker orginal [and Ultimaker orginal+]
For Ultimaker and Ultimaker orginal+
For Ultimaker 2 see below.
First prepare the Ultimaker by flipping the moving head upside down. Unscrew the sliding block M3 x 10mm bolts and remove the small wooden part. Unscrew 2 or 3 turns the M3 x 35mm bolts, see page 32 of the UM assembly manual. Now you can open the lever and reverse the action from page 53 of the UM assembly manual.
Remove the the X and Y axis, place the moving head from outside the right side panel in the machine and flip the head. The head will be 90 degrees rotated as well. Make sure the fan is pointing to the front. Then mount the head according to page 53 of the UM assembly manual.
Ultimaker 2
Since the side panels on the Ultimaker 2 are closed, the bowden tube cannot go through the side panel.
You should drill 2 holes with the hole saw according to the drawing.
Detach the bowden tube near the extruder drive by removing the blue clip. Push the tube connector down and remove the tube.
Unmount the metal corner cover which covers the extruder motor.
Unscrew the extruder motor, make sure the plastic parts stay together! [tip: use a bit of tape before removing].
Mark the center for the holes.
Drill gently – BE VERY CAREFULL – for the cables and other part which shouldn’t be drilled.
mount the extruder drive upside down, this should just fit.
Place the extruder in the front right corner.
Remove the moving head by unclicking the X and Y axis. See page 60 of the UM2 assembly manual.
Place the moving head through the hole and mount the X and Y axis again. The head will be 90 degrees rotaded.
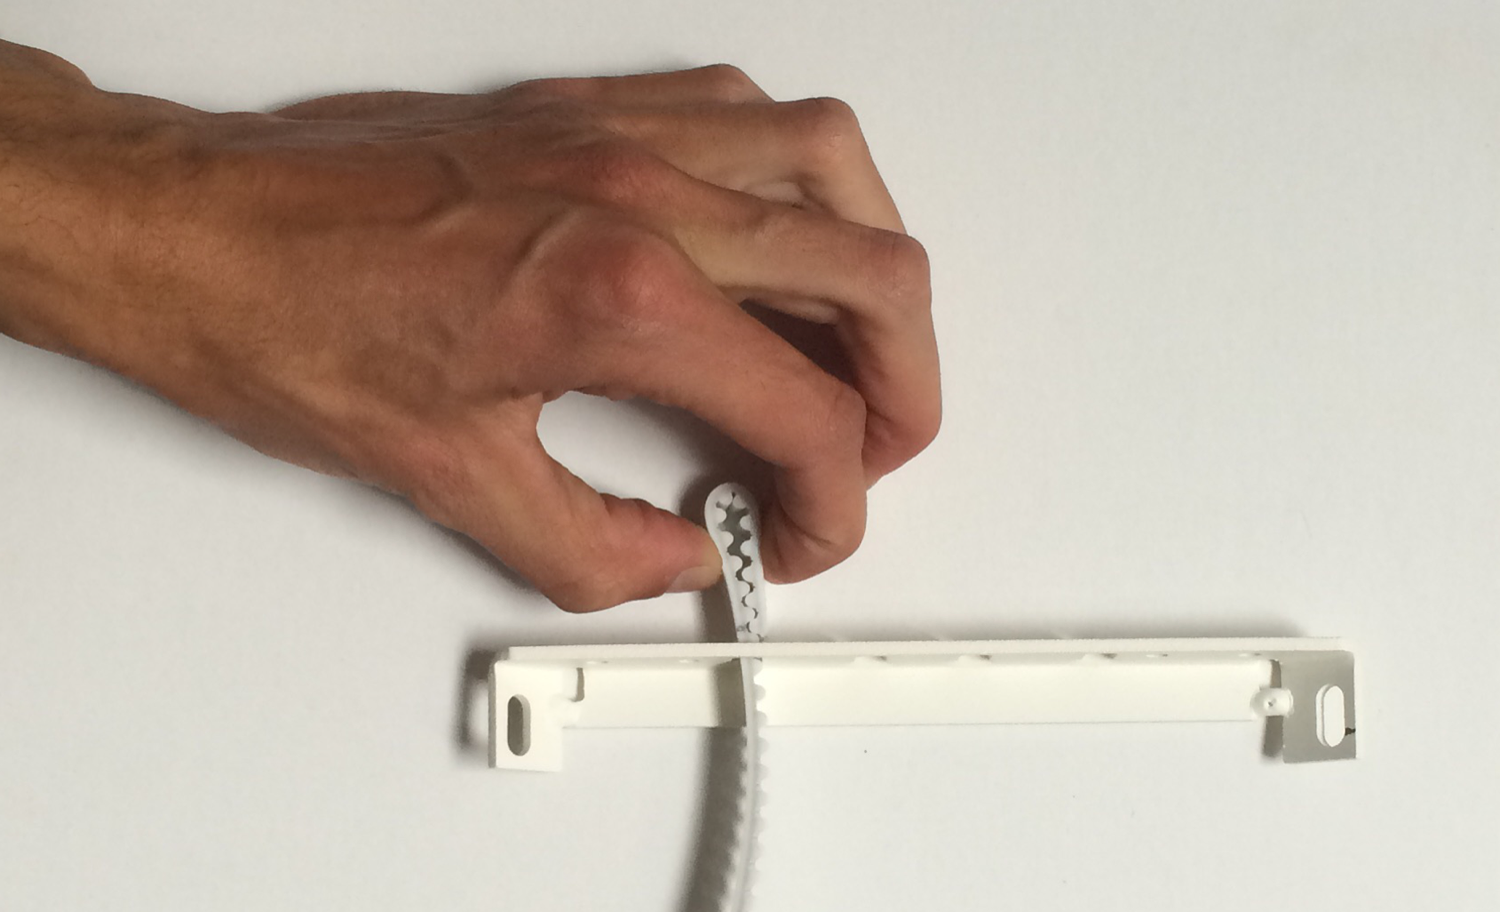
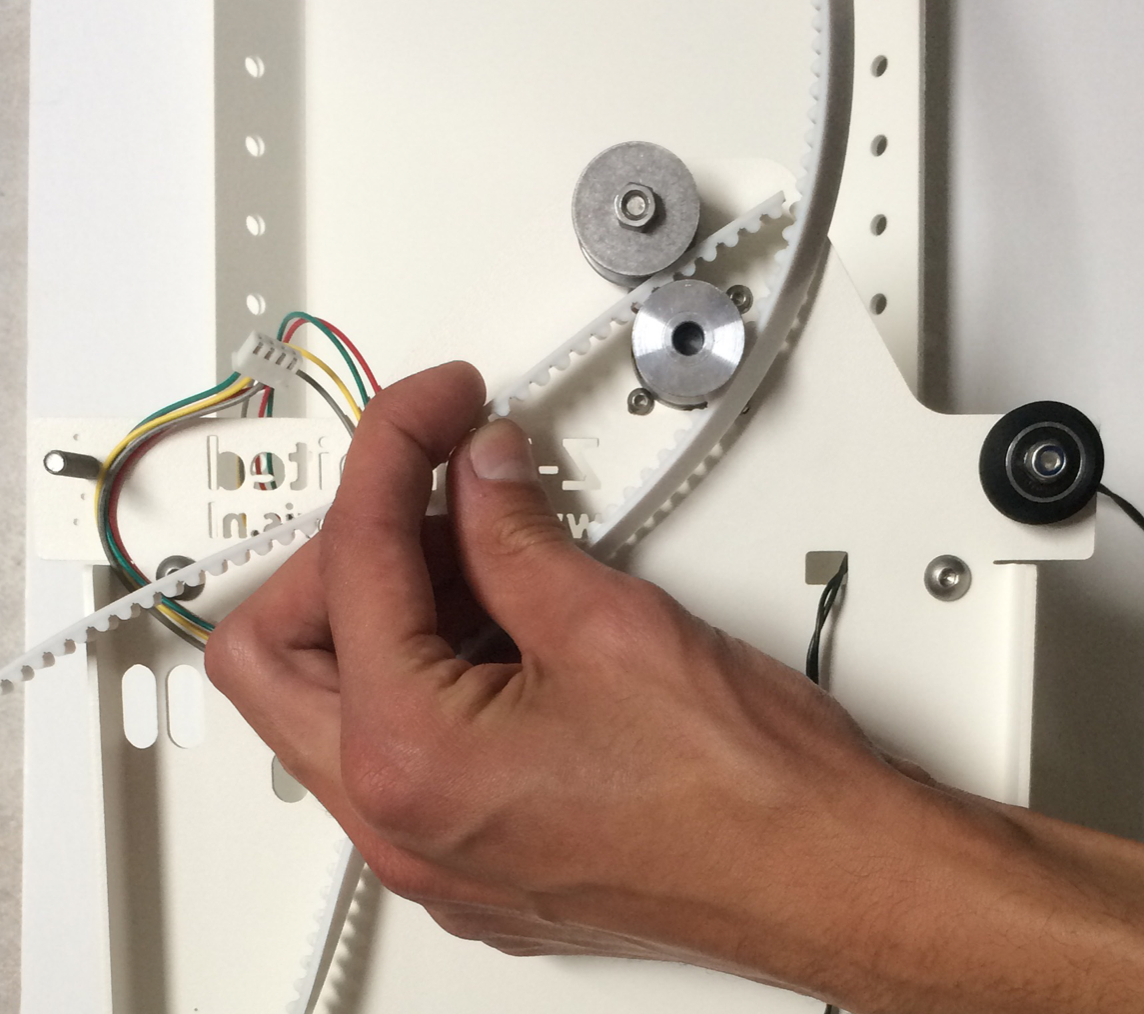
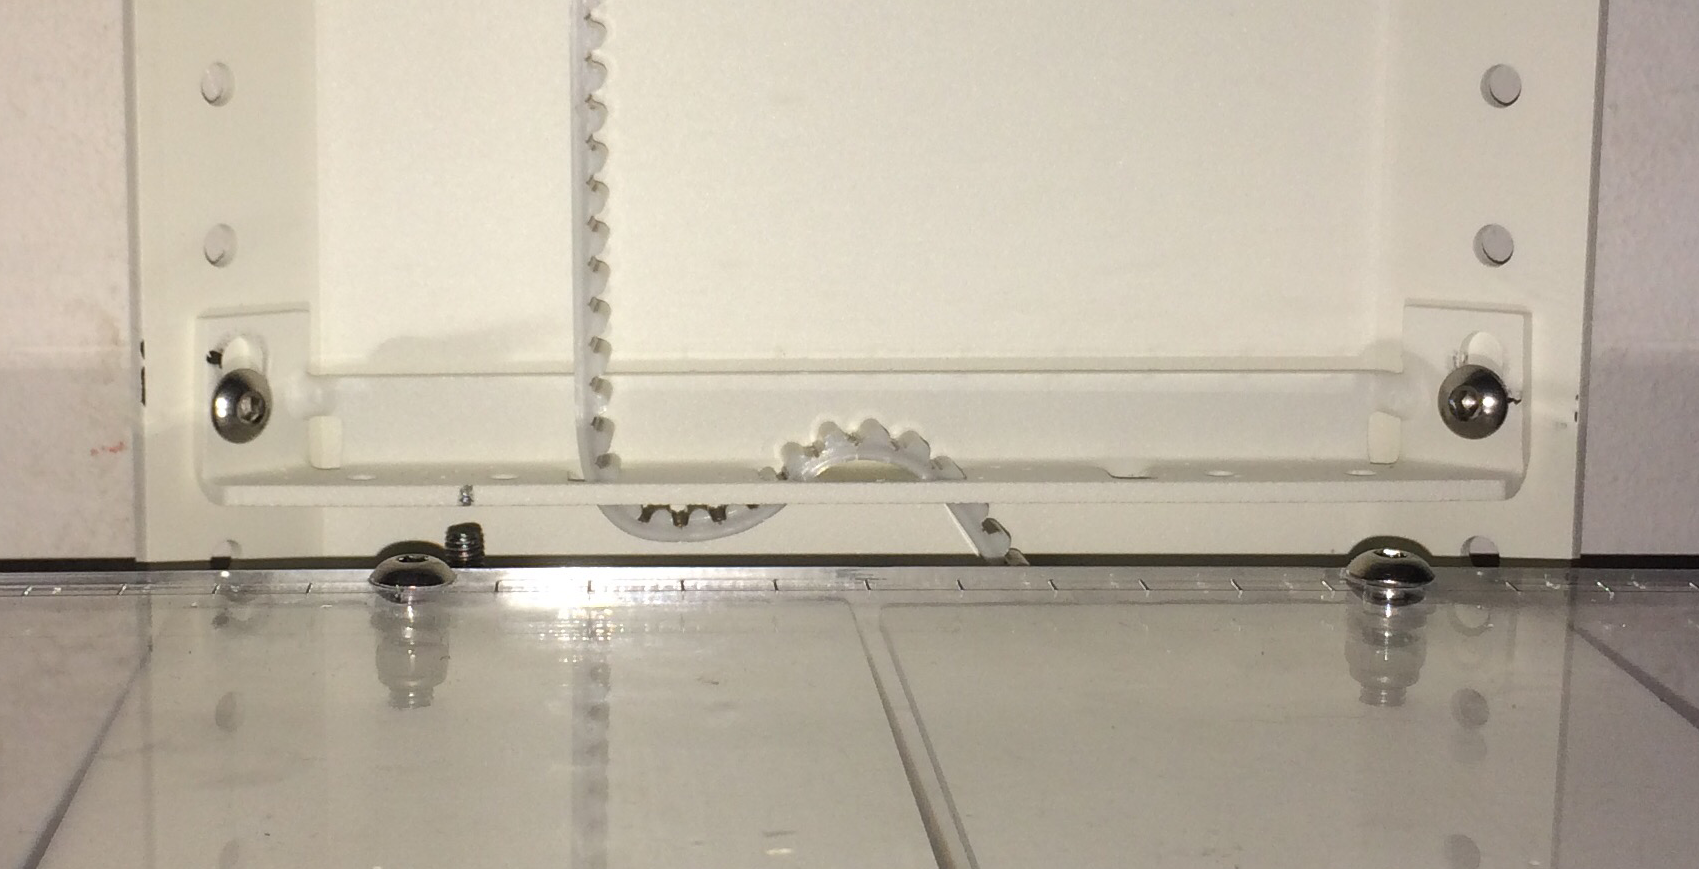
7. Bottom belt holder
Pull the timing belt through the belt holder until the 25th valley. Then pull the remaining belt through the next hole and back down through the one after. Fold back to horizontal and secure the belt with a cable tie.
8. Firmware & Software
Some changes have to be made to the firmware and to Cura.
Firmware
New firmware is essential to operate the Ultimaker with the Z-Unlimited. Main differences are flipping the X-axis, change accelaration and change the steps for the steppermotors. Besides that some features are activated as well like ‘baby stepping’, so you can live offset in X and Y after resuming a print to perfectly align the next layers.
Download the pre compiled firmware for your machine
The source of the firmware can be found on www.github.com/rooiejoris and www.github.com/TinkerGnome
Upload the firmware to you Ultimaker
Attach a USB cable to your Ultimaker. Open Cura [for now a version till 15.04.2], go to machine –> install custom firmware, locate your hex file.
After update, it can use stored settings!!!!
If so, then type in a console [printrun/pronterface] or run a gcode file with:
M206 X0.00 Y0.00 Z0.00 ;home offset to 0
M92 Z1333.3333 ;Steps per unit
M203 X200.00 Y200.00 Z10.00 E45.00 ;Maximum feedrates (mm/s)
M201 X1000 Y1000 Z100 E10000 ;Maximum Acceleration (mm/s2)
M500 ;store to EEPROM
Cura
The only change you have to make in Cura is the size of the build volume. Best is to add a new machine and afterwards go to Machine –> Machine settings and change the maximum height. For the Basic 600 mm, for the XXL 1800 mm and for the skyscraper 3000 mm.
9. Support arms and yarn
Needed
- Support arms
- Polyester yarn
- 4x M5 x 10mm bolt
- 4x M5 nut or butterfly nut
Let’s print big…!
Please let us know if something is not clear:
The google group is the place to post public questions at the moment.